# Introduction

<figure><img src="/files/my95pXdmsH239T6s20cZ" alt=""><figcaption></figcaption></figure>

### What is zcal?

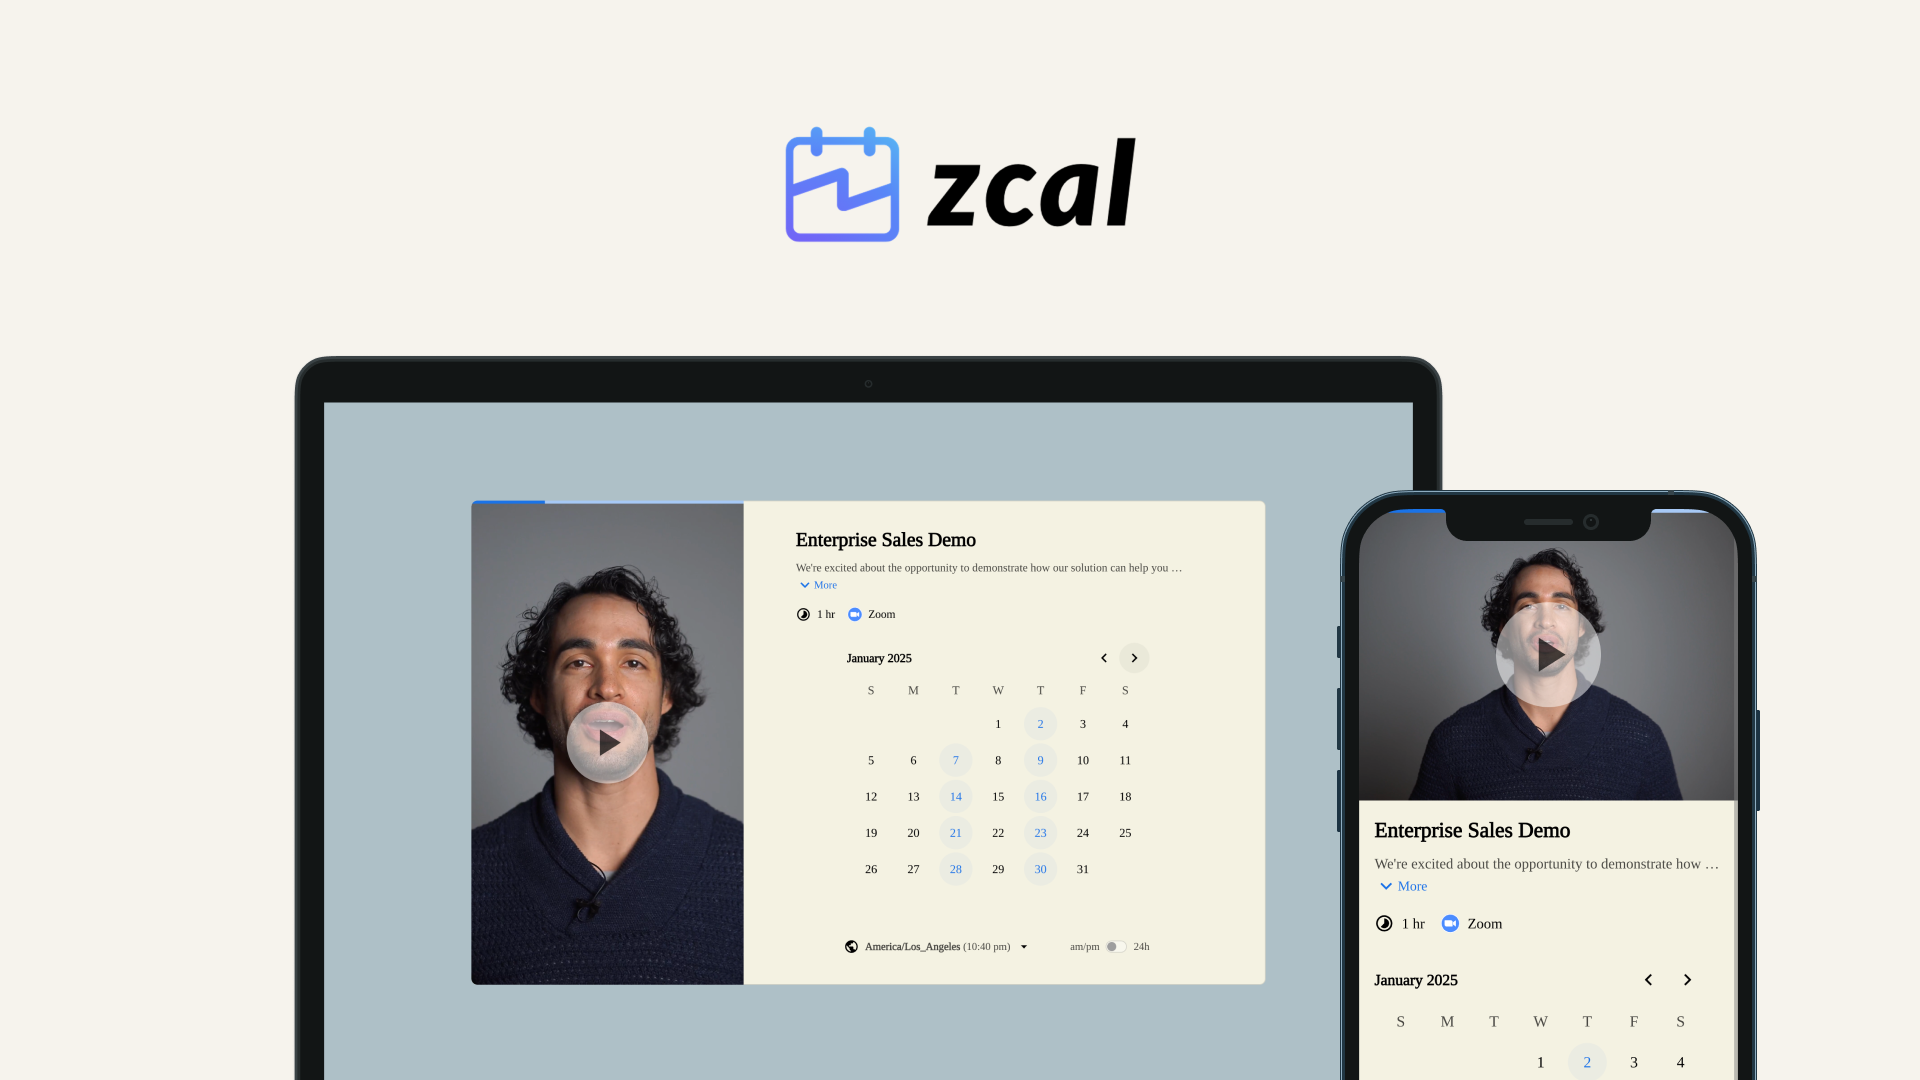
zcal is a modern scheduling tool that makes it easy to create beautiful booking pages for your clients. It is designed to help you increase booking rates and reduce no shows.

Our mission is to make individuals and businesses more productive by providing the most user-friendly, powerful scheduling service on the web.

### Why choose zcal?

Most scheduling apps treat design and branding as an afterthought. We made it our top priority. Whether you’re a solopreneur, coach, consultant, or part of a growing team, your brand is everything. zcal lets you show off your brand’s personality while simplifying your scheduling process.

Unlike other scheduling services, zcal has an intuitive, modern design that requires no learning curve to get started. Schedule 1-on-1's, team meetings, and more in seconds.

### How does it work?

When you share your zcal link, invitees can view your availability and select a time that works for both parties. Behind the scenes, zcal checks for events marked as 'Busy' on your calendar and removes them from your available times, preventing invitees from double booking you. Once a time is chosen and the meeting is scheduled, it's automatically published to your connected calendar. Both you and your invitee receive confirmations of the scheduled meeting by email.

### See the difference

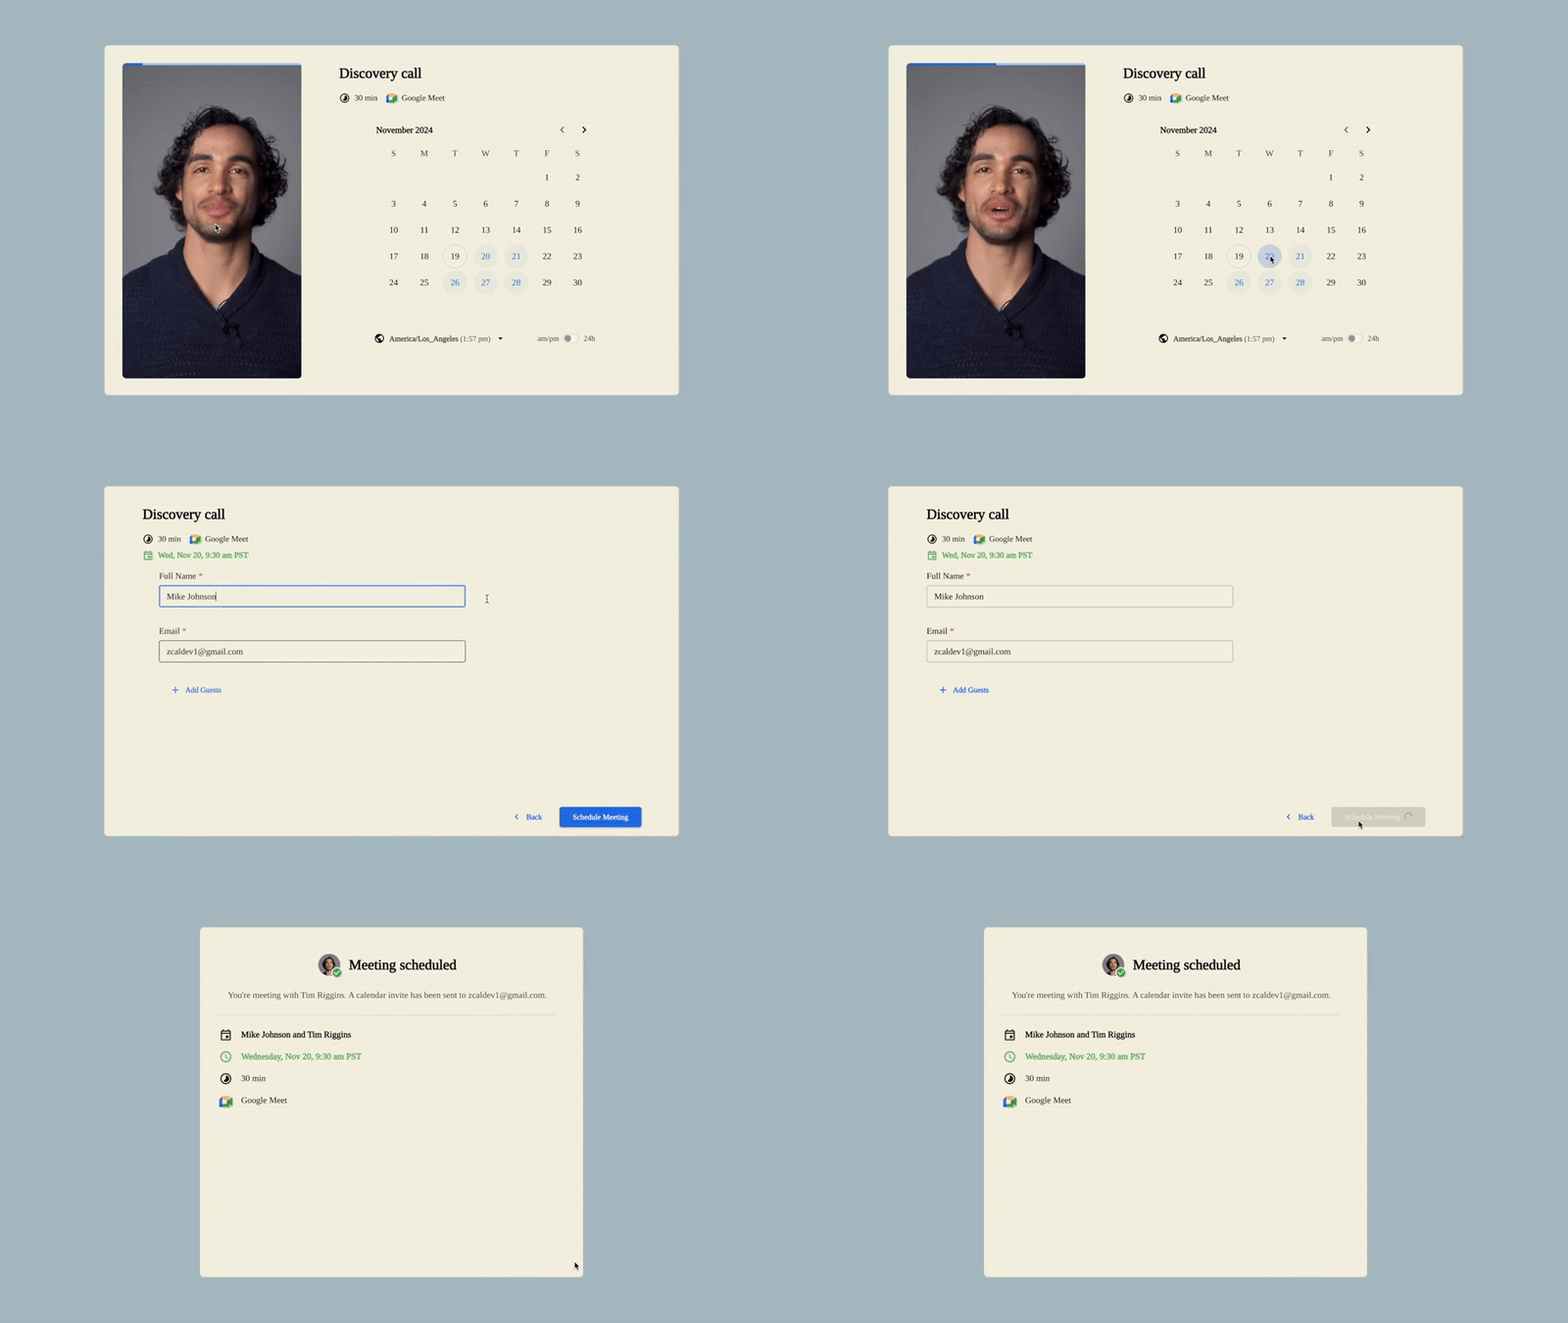
Check out an example of booking process below, and see for yourself what a difference zcal can make for your customer experience.

<figure><img src="/files/I2BC1Q7pqG5NZ86vpgUl" alt=""><figcaption></figcaption></figure>


# Getting Started

zcal streamlines the process of booking meetings by integrating with your existing calendars and allowing others to schedule appointments based on your availability. Here's how to get started:

### Sign up and connect your calendar

1. Sign up with your Google or Microsoft login (recommended) or with an email address.&#x20;
2. Follow the security prompts to connect zcal account with your chosen calendar platform. You must check all the permission checkboxes in order for zcal to accurately reflect your availability and prevent double bookings.

### Setup your calendar

1. Connect additional work and personal calendars on the [account calendars page](https://zcal.co/account/calendars). This allows zcal to check your availability and prevent double-booking.
2. Choose which calendars you want zcal to check when determining your availability by adding them to your list of read calendars.
3. Choose which calendar you want zcal to add events to by setting it as your write calendar.
4. Set your available hours and time zone on the [saved availability page](https://zcal.co/availability). The hours you choose are shared across all your invite links. You can set Weekly Hours which repeat every week, as well as Date-Specific Hours, which are one-time exceptions to your normal routine.

### Connect video conferencing

If you plan to use video conferencing for your meetings:

1. Connect your preferred video conferencing tool (e.g., Zoom) on the [account integrations page](https://zcal.co/account/integrations).
2. Select the integrated tool as the location when editing your invite link.

### Create your first invite link

Invite links are meeting templates that you'll use repeatedly to book meetings. We've provided 2 invite links to get you started. You can edit these or create your own. Here's how to set one up:

1. From the zcal Home page, click the **+ New Link** button.
2. Choose **One-on-One** for a meeting between you and one other person.
3. Here are the most important settings to be aware of:
   * Name: Give your event a clear, descriptive title so invitees know the purpose of the meeting.
   * Description: Provide context for the meeting or provide custom instructions to the invitee.
   * Duration: Set the length of the meeting.
   * Location: Specify how and where the meeting will take place (e.g., in-person, phone, or video call). Select Zoom or Google Meet to automatically generate meeting links.
4. Configure additional settings such as:
   * Buffer time: block time before or after meetings.
   * Minimum notice: how much advanced notice is required before an event.
   * Custom hours: use a different set of hours than your [saved availability](/invite-settings/design-theme).
   * Custom Questions: gather additional information from your invitees before the meeting (e.g., "What is the purpose of this meeting?").

### Customize your invite page

zcal provides a wide array of customization options to help you nail the perfect look for your scheduling page. If you haven't done so already, you can:

1. Customize your theme: select the font and colors that best represent your brand.
2. Add a story image or video to your invite page.

### Book a test meeting

Once your invite link is set up, book a meeting with yourself to see how the process works. If everything worked correctly, you should see the booked event appear on your calendar.

### Share your invite link

Share your invite link with others. They'll be able to see your available times and book a slot that works for them, automatically adjusting for time zones.


# Design theme

<figure><img src="/files/8wxxbj2At6voMvsqCjo5" alt=""><figcaption></figcaption></figure>

Editing your theme allows you to customize the look and feel of all your public facing zcal pages, including your invite and profile pages. You can edit your theme from multiple places in the app -  account settings, invite settings, and profile page settings. Here we'll show you how to edit the theme from account settings.

### Open the theme editor

Navigate to the [account page](https://zcal.co/account), then click the theme card under the `Appearance` section.

<figure><img src="/files/xEyAnxO8HHznGY6UvtcJ" alt=""><figcaption></figcaption></figure>

### Select a theme template

With the "Theme Gallery" tab selected, you can select one of our theme templates to instantly get a design that looks good with no customization required. This is also an easy way to switch to a dark mode theme.

<figure><img src="/files/k7Nru7LpfkpzVAvmL4xR" alt=""><figcaption></figcaption></figure>

### Customize your theme

With the "Edit theme" tab selected, you can customize your theme's font, background image, and colors.

Choose a font from the font picker.

<figure><img src="/files/P0hFP6mR3mmgHpSdr1tG" alt=""><figcaption></figcaption></figure>

Add a background image.

<figure><img src="/files/YnUFcdNNNrADJVBTHUzC" alt=""><figcaption></figcaption></figure>

Select your brand colors.

<figure><img src="/files/KObhMUB1MrCeHm2kD236" alt=""><figcaption></figcaption></figure>


# Story image

Brand your invite pages with large story images to make them uniquely yours.

1. Edit the invite link you want to add the story image to.

<figure><img src="/files/mLKMGVruMUN6lI4sJr5A" alt=""><figcaption></figcaption></figure>

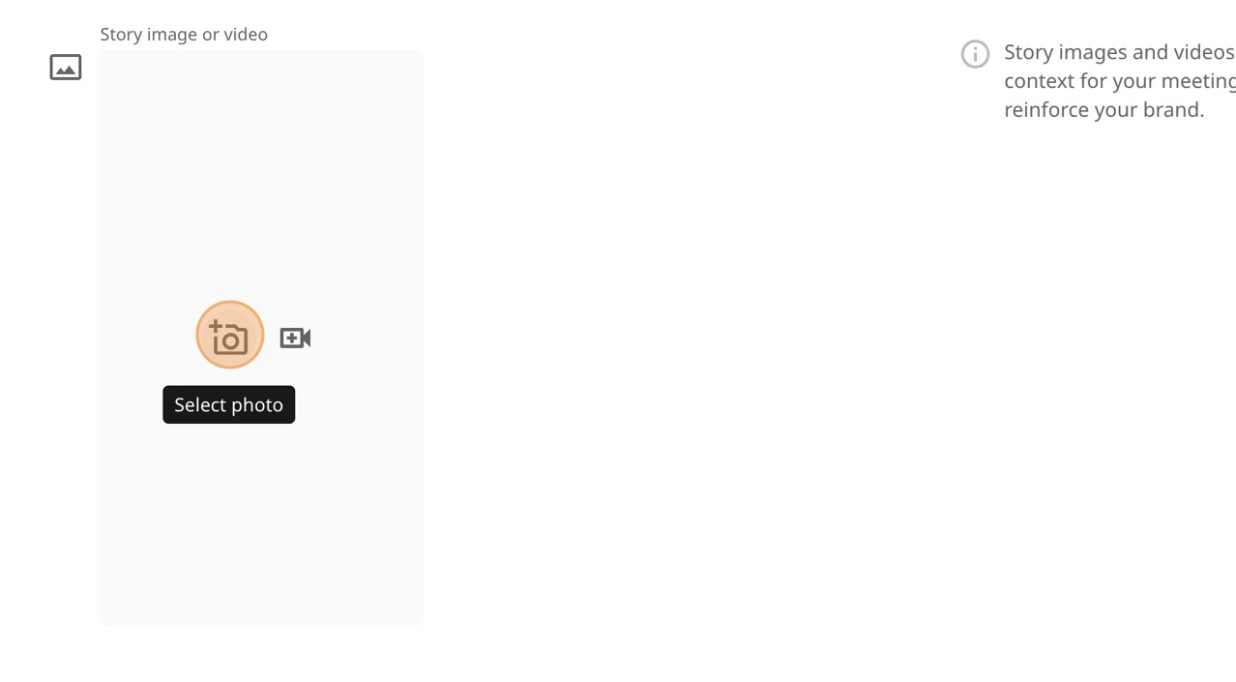
2. Under the Design section click the story Add Photo button.

<figure><img src="/files/QyfO0oQlgHMBKNzVq97d" alt=""><figcaption></figcaption></figure>

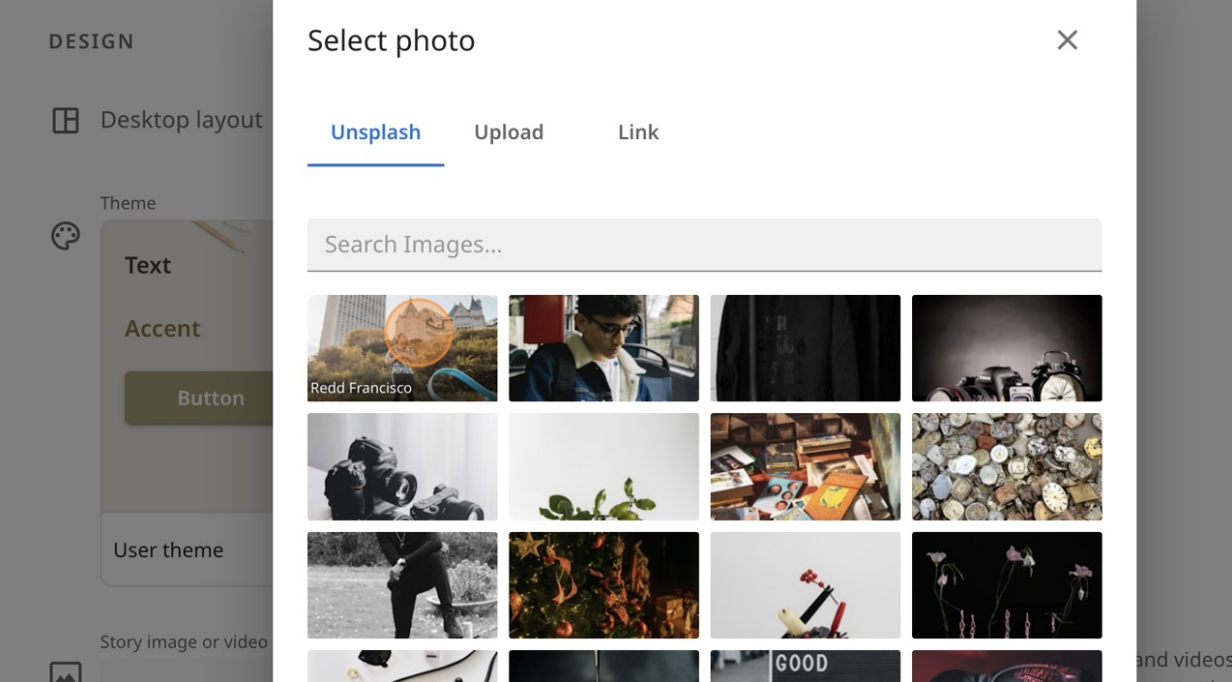
3. Select an image from the Unsplash gallery, or upload your own image.

<figure><img src="/files/gg02H5F2PHowMTosEf5S" alt=""><figcaption></figcaption></figure>

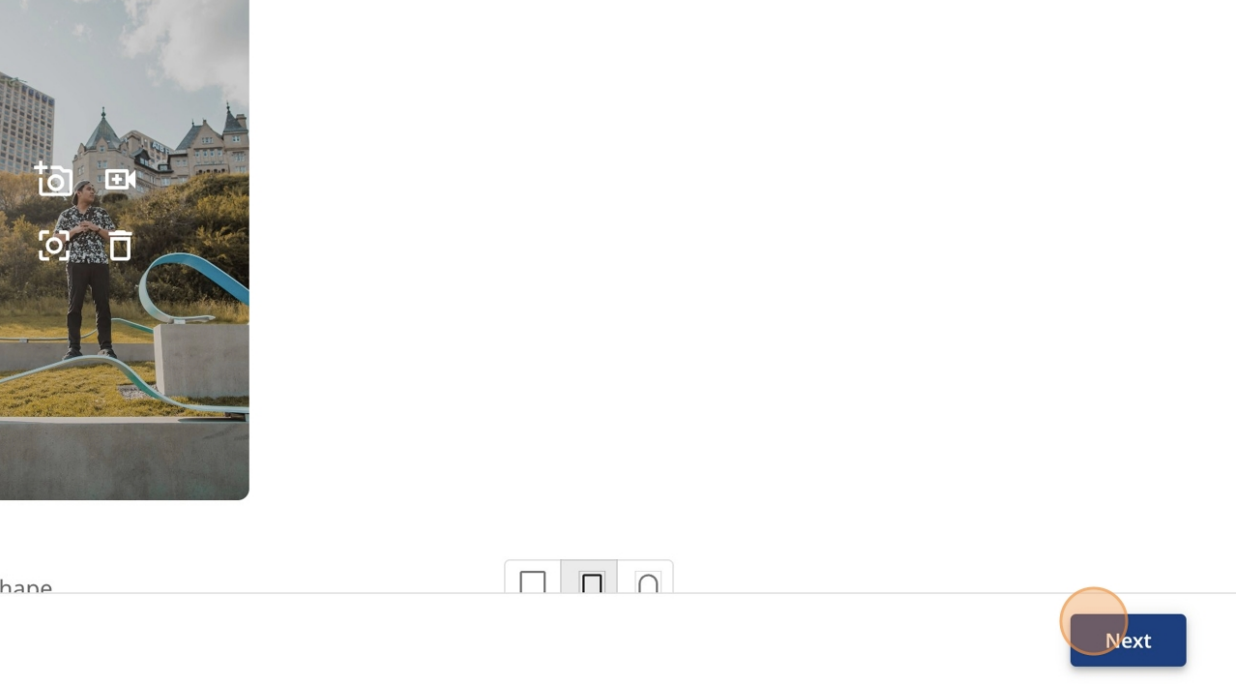
4. Click Next to advance to the next step.

<figure><img src="/files/raIGOiS5uMIsfNPbNPDs" alt=""><figcaption></figcaption></figure>

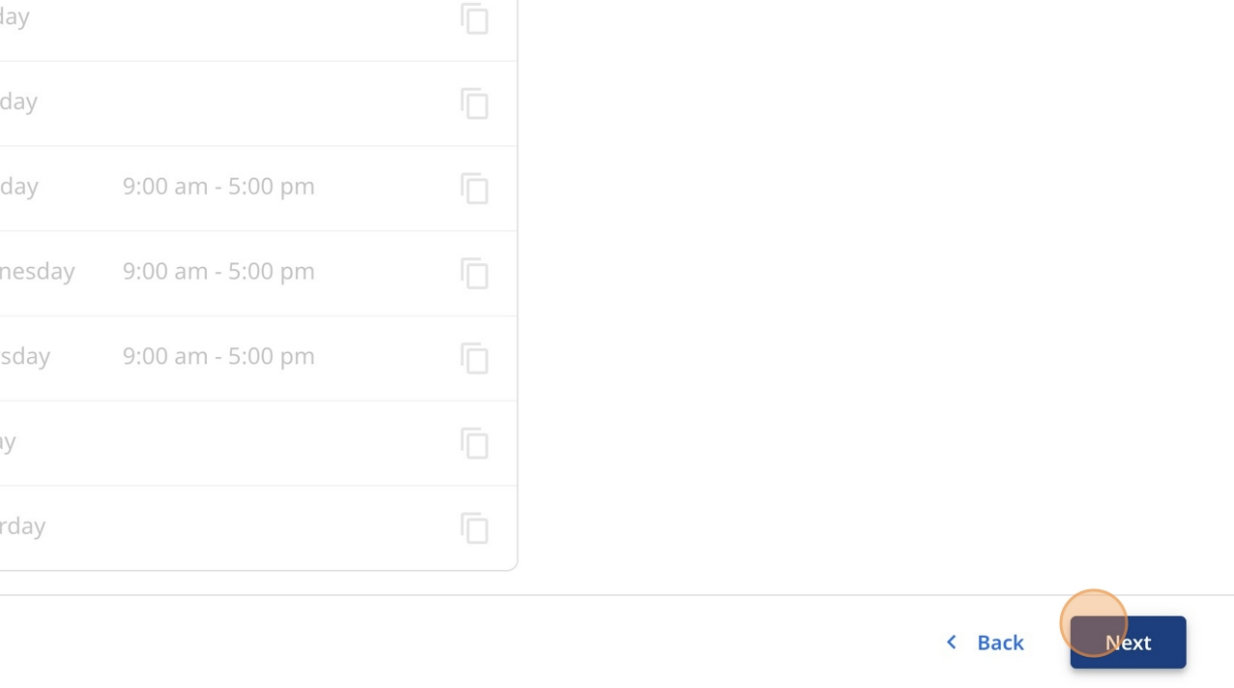
5. Click Next to advance to the next step again.

<figure><img src="/files/TnnzQcn2hpK5SerAOtpu" alt=""><figcaption></figcaption></figure>

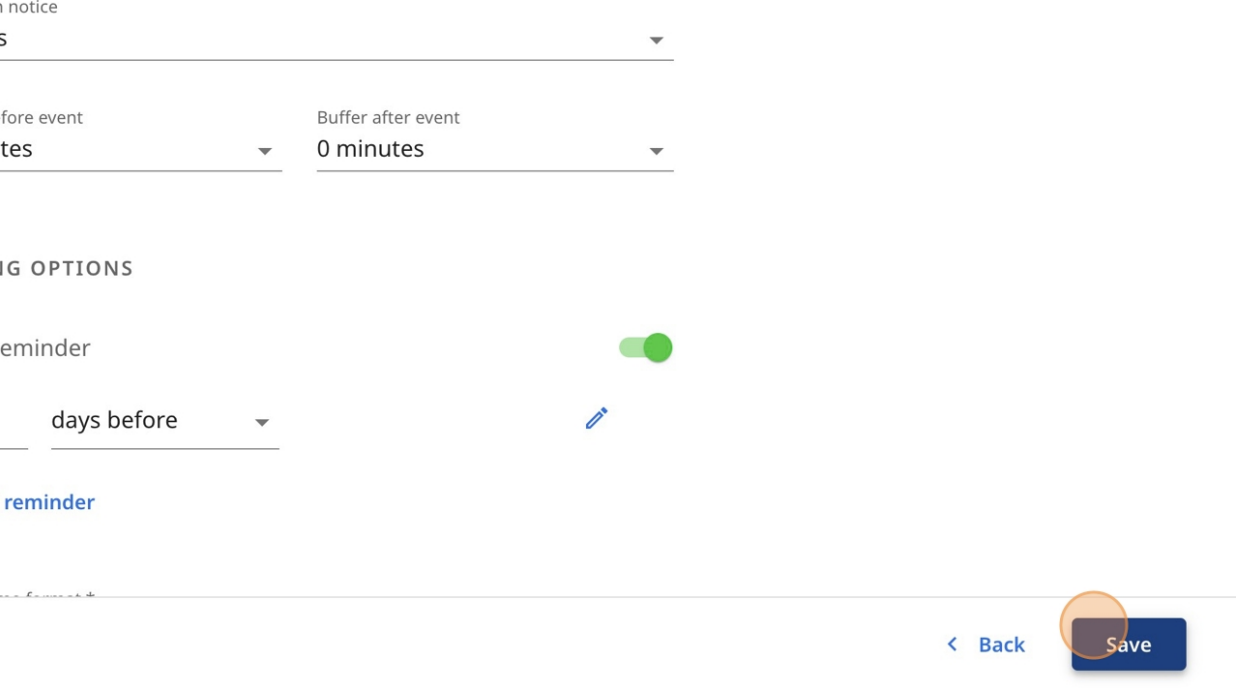
6. Click Save to commit your changes.

<figure><img src="/files/WeMQrNDOtTJELQzcs6jR" alt=""><figcaption></figcaption></figure>


# Add video conferencing link

With zcal add Zoom, Google Meet, or Microsoft Teams conferencing to any zcal event. When your guest(s) book a meeting, zcal will auto-create and send the meeting invite link via email.

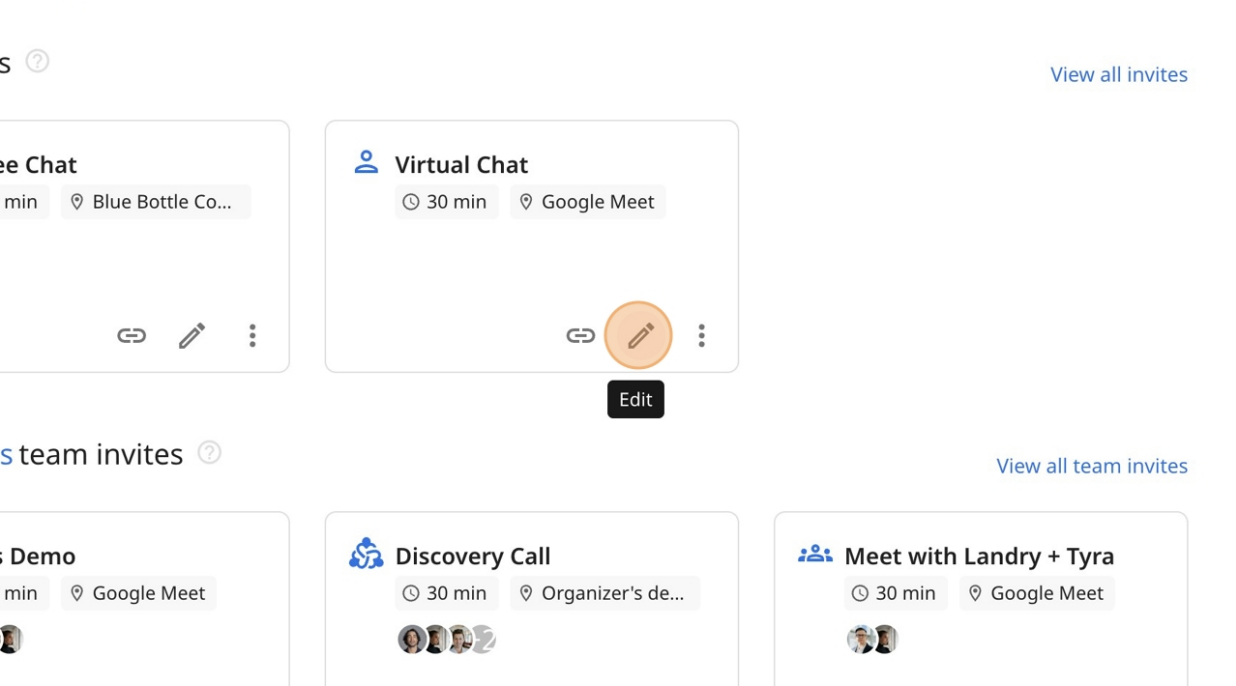
1\) Click on Edit for an existing invite or click on 'New link' if you want to create a new invite.

![Step 2 screenshot](https://images.tango.us/workflows/24a42dc3-cf44-451f-a23f-f26af884cc08/steps/103ed19f-13b0-4048-b8d0-9b19ee2d3027/ee6cc6d7-2d15-4676-88c3-6d9fbe8e6b4b.png?crop=focalpoint\&fit=crop\&fp-x=0.3505\&fp-y=0.4671\&fp-z=3.0134\&w=1200\&mark-w=0.2\&mark-pad=0\&mark64=aHR0cHM6Ly9pbWFnZXMudGFuZ28udXMvc3RhdGljL21hZGUtd2l0aC10YW5nby13YXRlcm1hcmsucG5n\&ar=1920%3A942)

2\) Under Basic info, you will see the 'Location' section to select your preferred video conferencing option.

![Step 3 screenshot](https://images.tango.us/workflows/24a42dc3-cf44-451f-a23f-f26af884cc08/steps/8a35daca-17a7-4caf-a295-2dfe71fa75c1/b7a2a9fa-1055-44c2-a409-88c9999a5ede.png?crop=focalpoint\&fit=crop\&fp-x=0.3906\&fp-y=0.4209\&fp-z=1.5661\&w=1200\&mark-w=0.2\&mark-pad=0\&mark64=aHR0cHM6Ly9pbWFnZXMudGFuZ28udXMvc3RhdGljL21hZGUtd2l0aC10YW5nby13YXRlcm1hcmsucG5n\&ar=1920%3A942)

3\) Click on the 'edit' icon to see the dropdown options and make your selection.

![Step 4 screenshot](https://images.tango.us/workflows/24a42dc3-cf44-451f-a23f-f26af884cc08/steps/c10d309a-0787-4d0c-9ac7-a607d44ff3e8/6aff2b7e-d626-434b-9ef3-22f6cd04f1f2.png?crop=focalpoint\&fit=crop\&fp-x=0.5104\&fp-y=0.4920\&fp-z=1.5789\&w=1200\&mark-w=0.2\&mark-pad=0\&mark64=aHR0cHM6Ly9pbWFnZXMudGFuZ28udXMvc3RhdGljL21hZGUtd2l0aC10YW5nby13YXRlcm1hcmsucG5n\&ar=1920%3A942)

4\) Click on 'Save' once done.

![Step 5 screenshot](https://images.tango.us/workflows/24a42dc3-cf44-451f-a23f-f26af884cc08/steps/c8dfe54b-a792-4ad9-b849-45f6c9feec0c/5397d0fb-a40b-4fc7-955d-4864be00d5d8.png?crop=focalpoint\&fit=crop\&fp-x=0.6536\&fp-y=0.6465\&fp-z=2.8402\&w=1200\&mark-w=0.2\&mark-pad=0\&mark64=aHR0cHM6Ly9pbWFnZXMudGFuZ28udXMvc3RhdGljL21hZGUtd2l0aC10YW5nby13YXRlcm1hcmsucG5n\&ar=1920%3A942)

***


# Custom questions

Add custom questions to your invite link to gather information from your invitees during the booking process.

1. Click on Edit for an existing invite if you want to add custom questions to it or skip this step if you are creating a new invite link.\
   ![](/files/wlQSl3ETnWKKrR9PQMBE)
2. Click on Next for the first 2 pages of the invite creation workflow.\
   ![](/files/I0UwrpQMvAwWsMkGTIJi)
3. On the third page, you will see the 'Add custom questions' option. Click on 'Add'.\
   ![](/files/XHpOWL3txtRE3CjySb6I)
4. Click 'Add new question'.\
   ![](/files/xLhG8JDADhUAqzFhHEby)
5. Select your preferred question type option to add. You can add as many questions as you like.\
   ![](/files/58gR4YejzgLvPCnOEdWd)
6. Click 'Apply' once you're done.\
   ![](/files/6Jo8WF8diVaNL0BBjXAF)
7. Click on Save and get your updated zcal link.\
   ![](/files/j4f9PG3yrTRzWxWk7YJT)

***


# File upload (attachment) custom question

### Ask invitees to upload a file

You can accept file uploads directly on your scheduling page by adding a **Custom Question** with the type **Attachment**.

1. Create a new link or edit an existing link.
2. Click Next twice to navigate to Step 3 of the wizard.
3. Click the Add button next to Custom Questions.
4. In the Edit Form dialog click the Add new question button.
5. Select the Attachment question type.
6. Type in the Question text. You can also type in Help Text to provide your invitees with detailed instructions on which file to upload.  If they need to download a file before uploading, for example to sign a document, you can type the download URL in this field and it will automatically be hyperlinked.
7. Click Apply then Save your link.


# Custom URL

In zcal, every invite link can be assigned a unique URL that you share with your guests. While zcal generates a default URL for you, you can customize the "slug" (the part at the end of the link) to make it more professional or easier to remember.

#### How to customize your invite link URL

1. Go to your Dashboard and click the Edit button with the pencil icon on the invite link you want to modify.
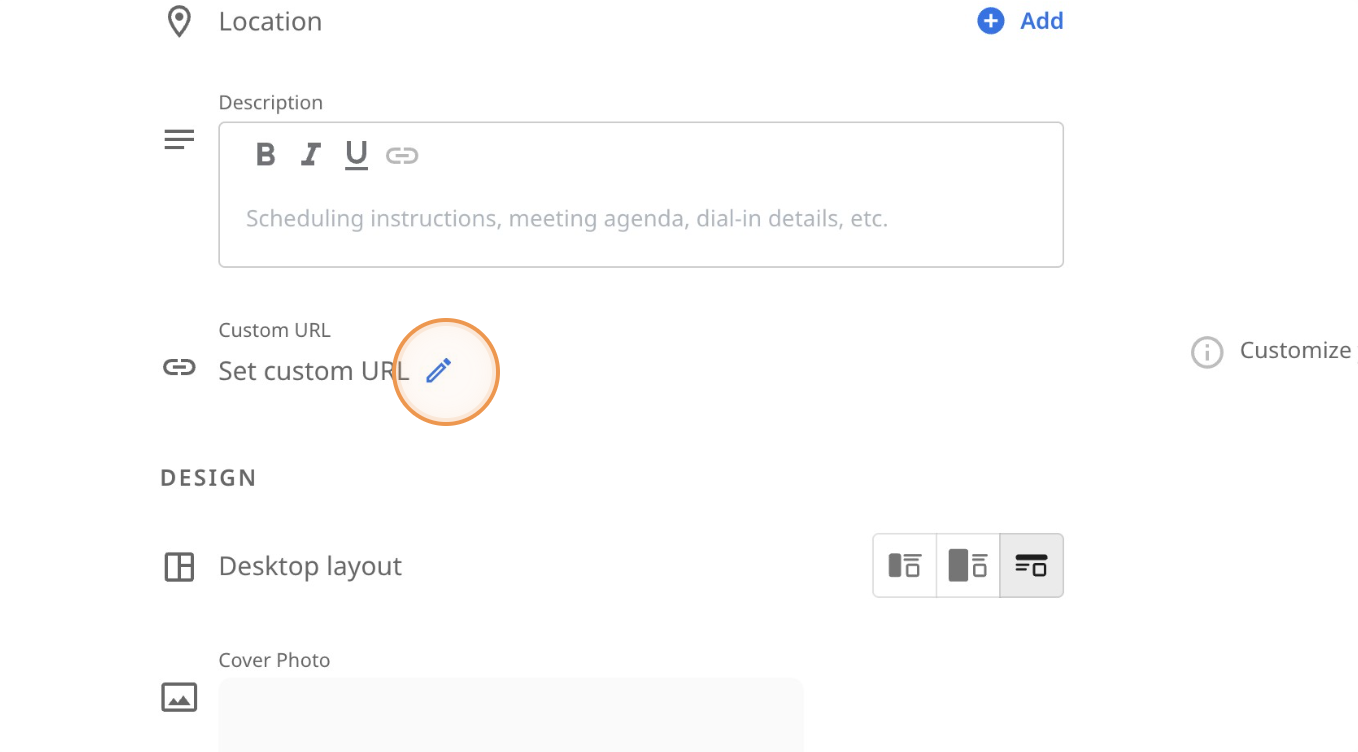
2. Scroll down to the Custom URL section and click the Edit button with the pencil icon.

   <figure><img src="/files/INjK9NkDr0bqEeA8mIPU" alt=""><figcaption></figcaption></figure>
3. A dialog box will appear. Type your desired slug into the text field (e.g., *coffee-chat* or *discovery-call*).

   <figure><img src="/files/JLpa5X7fedw9N7eBCSLn" alt=""><figcaption></figcaption></figure>
4. Click the Apply button to update the link.

   <figure><img src="/files/wCCKvh9PNvuVtHKN7nmu" alt=""><figcaption></figcaption></figure>
5. Click Next at the bottom of the page twice to proceed through the remaining settings, then click Save to finalize your changes.

***

Note: If you change the URL of an existing link, any old links you have already shared with guests will no longer work. Be sure to update your email signatures or shared messages with the new URL.


# Remove zcal branding

Remove zcal branding from scheduling pages, emails, and calendar events. Note that there are separate branding settings for individual accounts and teams.

### Remove branding for individual account

This will remove branding from all of your individual invite links.

1\) Navigate to <https://zcal.co/account>

2\) Turn on the switch for Remove zcal branding

<figure><img src="/files/Gg7ukjwsR5M49IUyXHdo" alt=""><figcaption></figcaption></figure>

### Remove branding for a team

This will remove branding from all of a team's invite links.

1\) Navigate to <https://zcal.co/teams>

2\) Click on the team you want to remove branding from

<figure><img src="/files/VQuQfAjr5ptbXrQRzlBj" alt=""><figcaption></figcaption></figure>

3\) On the General tab, turn on the switch for Remove zcal branding

<figure><img src="/files/Ojx445jiUfgJwqr76VRg" alt=""><figcaption></figcaption></figure>


# Buffer times

You can add buffer times before or after scheduled events to prevent back-to-back meetings and avoid being late in case a meeting runs over.

### **How buffer times work**

Invites can have a before buffer, after buffer, or both. *When a buffer is added to an invite, it affects new events created from that invite as well as all previous events created from that invite.* When an invite has a buffer time set, zcal won't allow an invite time slot to be booked if its buffer overlaps with any other event on your calendar.  Likewise, for invites without buffer times, zcal won't allow a time slot to be booked if it overlaps with the buffer of an existing zcal event on your calendar.

Let's look at a quick example. Say you want to invite someone to book a meeting with a 30 minute duration and you have an existing lunch event from 12:00 pm - 1:00 pm.  With a before buffer of 2 hours the earliest afternoon time that will appear on the invite page is 3:00 pm because there must be at least 2 hours of buffer between the start of the buffer event and end of the previous event.  With an after buffer of 1 hour the latest morning time that will appear on the invite page is 10:30 am because there must be at least 1 hour from the end of the buffer event to the start of the next event.

### **Add buffer times to your invite**

1. Create a new invite link or edit an existing one.
2. Click the Next button until you get to Step 3 of the wizard.
3. Select a non-zero value from the Buffer Before Event or Buffer After Event dropdown menus.
4. Save your invite.


# Displayed timezone

The timezone shown on your invite page depends on whether you've created your link with the **Displayed Timezone** option set to Invitee Local Timezone (the default setting) or Locked Timezone.

### Invitee Local Timezone

zcal will automatically detect your invitee's timezone and adjust the display of your available times accordingly.  If the invitee prefers to view your availability in a different time zone, he can change the timezone using the timezone dropdown.

### Locked Timezone

If you're meeting in person, selecting *Locked Timezone* will ensure that everyone sees your availability in the same timezone as the one set in your link settings (this should be set to the timezone at your meeting location).  Links with this option will always present availability in the same timezone, regardless of where in the world your invitees are.


# Minimum notice

The minimum notice feature is designed to prevent last-minute bookings and give you adequate time to prepare for scheduled meetings.

### What it does

* **Prevents immediate bookings:** When someone visits your invite page, they won't be able to schedule a meeting that falls within the minimum notice period you've set. For example, if you set a 24-hour minimum notice, someone trying to book a meeting today at 3 PM would only see availability starting tomorrow at 3 PM or later.
* **Ensures prep time:** This feature ensures you have enough time to research a prospect, gather materials, or simply mentally prepare for your upcoming appointments.
* **Professional appearance:** It can also make you appear more in demand by not allowing immediate bookings.

### How to set it up

1\) Edit the invite link you want to set the minimum notice for

2\) Click the `Next` button twice to get to the 3rd step of the edit wizard

3\) Click the `Minimum notice` dropdown menu and select the desired value.<img src="/files/f9YnHIXvEebz9d6Dh04g" alt="" data-size="original">

4\) Click the `Save` button.


# Email Reminders

Automated email reminders let you avoid manual follow-ups and ensure your invitees show up prepared for the meeting.

### Enable email reminders

1\) Edit your invite link. Under `Scheduling Options` turn on the `Email Reminder` switch.

<figure><img src="/files/gjF6IBP900wxbJUi3O6y" alt=""><figcaption></figcaption></figure>

2\) Set the time before the event that the email should be sent.

<figure><img src="/files/xsCPQM1xBD9EaQdCxomi" alt=""><figcaption></figcaption></figure>

## Customize email reminders

1\) Click the edit button next to the email reminder time that you wish to customize.

<figure><img src="/files/5nXzcVdoFIQm1UU3wRoC" alt=""><figcaption></figcaption></figure>

2\) Edit the content of the email. You can format your email and add links. You can also insert event variables into the email.

<figure><img src="/files/hh8CTPGiaefJwuUMrEnh" alt=""><figcaption></figcaption></figure>

3\) Click Save.

## Add more email reminders

You can add up to 3 email reminders per invite on the Pro plan and above.

1\) Click the Add reminder link.

<figure><img src="/files/7p4lmzzcH4A3pUKayIZV" alt=""><figcaption></figcaption></figure>

2\) Customize the time and email content for your new reminder.


# Custom confirmation emails

Send invitees your own custom confirmation email — with your own subject, body, formatting, and event variables — immediately after they book.

### Common use cases

* Include preparation instructions — what to bring, how to prepare, where to park, how to join.
* Link to your intake form so the invitee can fill it out before the meeting.

### How it works

Custom confirmation emails are available on the Pro plan and above. When enabled, your custom email is sent to the invitee (and any guests) immediately after the event is scheduled.

What it sends alongside depends on whether you have a calendar connected:

* **Calendar connected (Google or Outlook):** The calendar service sends its own event invitation. Your custom email is sent **in addition** — alongside the calendar invite.
* **No calendar connected:** zcal would normally send its own default booking confirmation. Your custom email **replaces** that default.

Reminders, reschedule notifications, and cancellation notifications continue to use zcal's default content regardless of calendar setup.

#### Enable a custom confirmation email

1\) Edit your invite link. Under `Scheduling Options` turn on the `Custom confirmation email` switch.

<div align="left"><figure><img src="/files/3XZlFElCCYhXOlqQw2kh" alt="" width="563"><figcaption></figcaption></figure></div>

### Customize the confirmation email

1\) Click the Edit button next to the `Custom confirmation email` switch.

<div align="left"><figure><img src="/files/TxgPHJlyg7bd5YvMNRru" alt="" width="563"><figcaption></figcaption></figure></div>

2\) Edit the subject and body of the email. You can format your email and add links. &#x20;

<div align="left"><figure><img src="/files/zT1SyuGcK4mDjhiRSjYT" alt="" width="563"><figcaption></figcaption></figure></div>

3\) You can also insert event variables into the email — for example, the invitee's name, the event date and time, or the reschedule and cancel links.

<div align="left"><figure><img src="/files/Cqd6WA0MUkDHpZhgtC0R" alt="" width="563"><figcaption></figcaption></figure></div>

4\) Click Save.


# Redirect on booking

Redirect invitees to your website after they finish booking a time on your calendar.

### Add a redirect url to your invite link

1\) Edit your invite link. Under `Scheduling Options` turn on the `Redirect on booking` switch.

<figure><img src="/files/60yzAFbsirDjrqxDa6N3" alt=""><figcaption></figcaption></figure>

2\) Enter the URL where you want to redirect invitees.

<figure><img src="/files/x1CUclQdg1d8LErWCPiq" alt=""><figcaption></figcaption></figure>

3\) Save your invite. Invitees will now be redirected to your URL after booking events on this invite.

### Query parameter reference

zcal will append the following query string parameters to the redirect URL:

#### startDate

The event date and time in ISO format.

Example: `startDate=2026-01-01T18%3A30%3A00.000Z`

#### timezone

The invitee's IANA timezone.&#x20;

Example: `timezone=America%2FLos_Angeles`&#x20;

#### fullName

The invitee's full name.

Example: `fullName=John%20Doe`

#### email

The invitee's email.

Example: `email=john@gmail.com`

#### a\[custom question index]

Answer to a custom question. Each custom question has its own query parameter and question indices start from 0.

Freeform custom questions e.g. Short text can accept any string as a value

Example: `a0=Q1`

Multiple choice custom questions e.g. Dropdown can only accept strings that match one of the provided options.

Example: `a2=Option+1`

Checkbox custom questions can accept multiple comma-separated string values, all of which must match the provided options.

Example: `a3=Option+1,Option+2`

Phone number custom question responses must start with a valid country code.

Example: `a5=%2B15555555555`

#### guests

Guest emails.

Example: `guests=adam@gmail.com,bob@gmail.com`

#### locationIndex

The index of the location options your invitee selected. Indices start from 0.

Example: `locationIndex=1`

#### duration

The event duration.

Example: `duration=60`

#### smsPhone

The invitee's SMS phone number.

Example:`smsPhone=%2B15555555555`

### UTM parameter forwarding

zcal will also append UTM parameters to the redirect URL:

**utm\_campaign**

UTM tracking parameters are forwarded from the invite url.

**utm\_source**

UTM tracking parameters are forwarded from the invite url.

**utm\_medium**

UTM tracking parameters are forwarded from the invite url.

**utm\_content**

UTM tracking parameters are forwarded from the invite url.

**utm\_term**

UTM tracking parameters are forwarded from the invite url.


# Custom write calendar

zcal allows you to select which calendar to add events to for each invite link. This gives you the flexibility to organize your bookings by directing different types of events to different calendars.

1\) Create a new invite or edit an existing invite.

2\) Navigate to the last step of the wizard

3\) Enable the `Custom write calendar` switch

&#x20;

<figure><img src="/files/zYolCZLlHeUtRiqVz6ln" alt=""><figcaption></figcaption></figure>

4\) Select the calendar you want to add events to in the `Write calendar` dropdown menu

<figure><img src="/files/Sc8QAiuLqAPNjlRcfUpC" alt=""><figcaption></figcaption></figure>


# SMS Reminders

SMS reminders help ensure your attendees never miss a scheduled meeting. Note: SMS reminders are available on the Pro plan and above.

### Setting Up SMS Reminders

You can configure SMS reminders while creating or editing your scheduling link. Turning this setting on will automatically add a required phone number question to your invite link.

1\) Create a new invite or edit an existing invite.

2\) Navigate to the last step of the wizard

3\) Enable the `SMS reminder` switch

<figure><img src="/files/FqHeUAQ0ajdCgcb2dKPd" alt=""><figcaption></figcaption></figure>

4\) Set the amount of time before your event when the SMS reminder should be sent.

### SMS Credits and Limits

#### Monthly Credit Allowance

* Each account receives SMS credits per month (750 on the Pro plan, 1500 on the Business plan)
* Credits reset automatically on the 1st day of each month
* You'll receive an email notification if you exceed your monthly credit limit

#### Credit Usage by Country

SMS credit costs vary by country and are divided into three tiers:

**Tier 1 (10 credits per SMS)**

* United States (US)
* Canada (CA)

**Tier 2 (19 credits per SMS)**

* United Kingdom (GB)
* Brazil (BR)
* Mexico (MX)
* Australia (AU)
* South Africa (ZA)
* Colombia (CO)
* Thailand (TH)
* China (CN)

**Tier 3 (38 credits per SMS)**

* France (FR)
* India (IN)
* Netherlands (NL)
* Ireland (IE)
* Germany (DE)
* Spain (ES)
* Italy (IT)
* Finland (FI)
* Sweden (SE)
* Singapore (SG)
* Belgium (BE)
* Austria (AT)
* Poland (PL)
* Greece (GR)
* United Arab Emirates (AE)
* Argentina (AR)
* Japan (JP)
* Chile (CL)
* Saudi Arabia (SA)
* Estonia (EE)
* Portugal (PT)
* South Korea (KR)
* Taiwan (TW)
* Turkey (TR)
* Luxembourg (LU)
* Venezuela (VE)
* Romania (RO)
* Hungary (HU)
* Peru (PE)
* Lithuania (LT)
* New Zealand (NZ)
* Denmark (DK)
* Hong Kong (HK)
* Norway (NO)
* Costa Rica (CR)

#### Message Length and Credit Calculation

SMS messages are charged in 160-character chunks. If your message exceeds 160 characters, it will use additional credits accordingly:

* 1-160 characters = 1 SMS worth of credits
* 161-320 characters = 2 SMS worth of credits
* And so on...

For example:

* A 150-character message to the US = 10 credits
* A 200-character message to France = 76 credits (2 × 38 credits)

It is advised to keep your reminder messages concise to avoid using multiple SMS chunks

### Best Practices

1. Write clear, concise reminder messages
2. Include essential information only (date, time, and meeting link)
3. Set reminders at appropriate intervals (e.g., 24 hours before the meeting)

### FAQ

**Q: What happens if I run out of SMS credits?** A: You'll receive an email notification when you're running low on credits. Once depleted, no new SMS reminders will be sent until your credits reset on the 1st of the next month.

**Q: Do unused credits roll over to the next month?** A: No, unused SMS credits do not roll over. Your balance resets at the beginning of each month.

**Q: How many SMS reminders can I add?** A: Currently we support 1 SMS reminder per invite.


# Follow-up Emails

Follow-up emails are automated messages sent to attendees after your scheduled meetings. This feature helps maintain engagement and gather feedback from your meeting participants.

When follow-up emails are enabled for an invite, zcal will automatically sends follow-up emails to all attendees who were present after the amount of time configured.

### Handling no-shows

If you want to prevent a follow-up email from being sent for an attendee who didn't end up showing up to the event, you can mark them as a "no-show". You can mark an attendee as a no-show by going to the event details and clicking on the icon next to their name.

1. Go to the event the attendee missed - you can see all past event by going to <https://zcal.co/events?time=past>
2. Click into the event to se the event details. Next to each attendee there is a button to toggle their no-show status.

<figure><img src="/files/L0M3OXUWwSXZ10QpATI1" alt="" width="375"><figcaption></figcaption></figure>


# Pre-populate form fields

Save time for clients by pre-populating their info on your invites. You can pre-populate every field on the invite page including name, email, and custom questions.&#x20;

Pre-populated fields are set by passing query parameters in the invite URL. Here's an example URL:

`https://zcal.co/i/12345678/?startDate=2026-01-01T18%3A30%3A00.000Z&timezone=America%2FLos_Angeles&name=John%20Smith&email=john@gmail.com&a0=Q1&a1=Q2&a2=Option+1&a3=Option+1,Option+2&a4=Option+1&a5=%2B15555555555&guests=adam@gmail.com,bob@gmail.com&locationIndex=1&smsPhone=%2B15555555555&duration=60`

###

### Add query parameters to your invite link

1\) Copy the link for the invite you want to share

2\)  If your link doesn’t already have a query parameter add "?" to the end of the link. If there's already a query parameter in your link, continue to step 4.&#x20;

3\) Add a property name (the field name) followed by the user's information (the field value). To add space between words, enter "%20".&#x20;

4\) To add variables to your link, enter "&" then add more query parameters per step 3.

Notes:&#x20;

* Invalid query parameters will be ignored.
* Query parameters can also be added to [embed](/share/embed) code

###

### Query parameter reference

Here is a list of the query parameters you can add to your invite link.

#### startDate

The date and ISO time to pre-fill.

Example: `startDate=2026-01-01T18%3A30%3A00.000Z`

#### timezone

The IANA timezone to pre-fill.&#x20;

Example: `timezone=America%2FLos_Angeles`&#x20;

#### name

The invitee's name.

Example: `name=John%20Doe`

#### email

The invitee's email.

Example: `email=john@gmail.com`

#### a\[custom question index]

Answer to a custom question. Each custom question has its own query parameter and question indices start from 0.

Freeform custom questions e.g. Short text can accept any string as a value

Example: `a0=Q1`

Multiple choice custom questions e.g. Dropdown can only accept strings that match one of the provided options.

Example: `a2=Option+1`

Checkbox custom questions can accept multiple comma-separated string values, all of which must match the provided options.

Example: `a3=Option+1,Option+2`

Phone number custom question responses must start with a valid country code.

Example: `a5=%2B15555555555`

#### guests

Guest emails. Separate with commas if there are multiple guests.

Example: `guests=adam@gmail.com,bob@gmail.com`

#### locationIndex

If your invite has multiple location options, you can pre-select a location by index. Indices start from 0.

Example: `locationIndex=1`

#### duration

If your invite has multiple duration options, you can pre-select a duration by value.

Example: `duration=60`

#### smsPhone

If your invite has SMS reminders enabled, you can set a phone number starting with a valid country code.

Example:`smsPhone=%2B15555555555`

### UTM parameter forwarding

zcal will also forward UTM parameters in the URL to Zapier and webhooks:

**utm\_campaign**

This UTM tracking parameter is forwarded from the invite URL.

**utm\_source**

This UTM tracking parameter is forwarded from the invite URL.

**utm\_medium**

This UTM tracking parameter is forwarded from the invite URL.

**utm\_content**

This UTM tracking parameter is forwarded from the invite URL.

**utm\_term**

This UTM tracking parameter is forwarded from the invite URL.


# Multiple location options

Configure your invite link to let your invitees choose their preferred meeting location or conferencing tool. When you set more than one location set on your invite, invitees will be asked to choose a location during the booking process.

1\) Edit your invite link. Click `Add location option` to add another location.

<figure><img src="/files/h1a0g4jHhQvRPHeprDoK" alt=""><figcaption></figcaption></figure>

2\) In the location dialog select an option from the dropdown menu. If you want to enter a physical location select the `Custom Text` option.

<figure><img src="/files/3GphPey5ODuGsH2WRstD" alt=""><figcaption></figcaption></figure>

3\) Save your changes. This will add the location option to your invite link.

<figure><img src="/files/yhmJNnEAMGvmTibYSfVT" alt=""><figcaption></figcaption></figure>

4\) When invitees open your invite page they will be asked to choose their preferred location on the contact form.

<figure><img src="/files/IojNGtF6nxUbJAFf5Ho8" alt=""><figcaption></figcaption></figure>


# Limit booking frequency

Limit the number of meetings that can be booked on a per day, week, and month basis. Frequency limits apply on a per-link basis.

### How frequency limits work

Consider the example of a therapist who only wants to allow one booking per day. If the invite link's frequency limit is set to 1/day, then once an event is booked for a given day, the remaining times for that day will be hidden from the invite link.

### Enable frequency limits

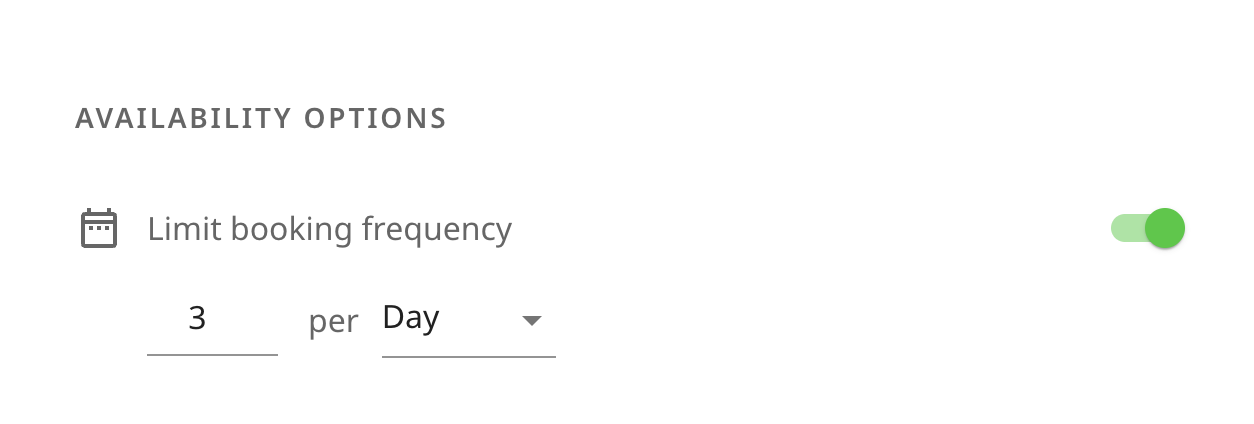
#### 1) Edit your invite link. Under `Availability Options` turn on the `Limit booking frequency` switch.

<figure><img src="/files/IsLm4Y0UAPzI0OCMLoeg" alt=""><figcaption></figcaption></figure>

2\) Set the number of bookings and the unit of time for the limit.


# Clone (duplicate) link

## How to clone an invite link

Cloning allows you to quickly create a new invite link by duplicating the settings and configuration of an existing one.

1\) On your zcal dashboard, click the More actions button (three vertical dots) in the bottom-right corner of the invite you wish to copy.

<figure><img src="/files/7svTXvXjO0yhXB8jjlIS" alt="" width="563"><figcaption></figcaption></figure>

2\) Select Clone from the dropdown menu.

<figure><img src="/files/olhg7HjEOxr8quG2KK3M" alt="" width="563"><figcaption></figcaption></figure>

3\) A confirmation modal will appear. Click Continue to create the new copy of your invite link.

<figure><img src="/files/6ttTFzNJHMQHFed9XNfy" alt="" width="563"><figcaption></figcaption></figure>

The cloned link will appear on your zcal dashboard. It will have the original invite name with a number appended to it indicating that it is the copied version.


# Personalized (one-time use) links

Create a personalized link in zcal to provide a special invitee with a one-time use invite link. Personalized links can only be booked once and do not appear on your profile page.

#### 1. Click on the menu button for the existing link for which you intend to create a personalized 'one-time use' link. Then click the "Create personalized invite" menu option.

<figure><img src="/files/2riCcNESENvmnILLypof" alt=""><figcaption></figcaption></figure>

<figure><img src="/files/nlRq2zhTDoI3NXzxeLLS" alt=""><figcaption></figcaption></figure>

#### 2. In the dialog box, you will have the option to select your invite contact from the existing contact list or add it manually.

![](https://images.tango.us/public/edited_image_0deb79cc-46c2-4e5a-9a82-8ac531d34920?crop=focalpoint\&fit=crop\&fp-x=0.5049\&fp-y=0.6757\&fp-z=1.7986\&w=1200\&mark-w=0.2\&mark-pad=0\&mark64=aHR0cHM6Ly9pbWFnZXMudGFuZ28udXMvc3RhdGljL21hZGUtd2l0aC10YW5nby13YXRlcm1hcmsucG5n\&ar=1918%3A941)

#### 3. Add a 'welcome video' if needed and click on 'create invite' button at the bottom

![](https://images.tango.us/public/screenshot_563a816c-ce1b-477f-a033-b9b5e4fda623?crop=focalpoint\&fit=crop\&fp-x=0.5000\&fp-y=0.5000\&fp-z=1.0000\&w=1200\&mark-w=0.2\&mark-pad=0\&mark64=aHR0cHM6Ly9pbWFnZXMudGFuZ28udXMvc3RhdGljL21hZGUtd2l0aC10YW5nby13YXRlcm1hcmsucG5n\&ar=1920%3A942)

#### 4. You can also manually add the invitee's information.

![](https://images.tango.us/public/screenshot_521da16f-6ff1-470f-824b-8917967bfbf4?crop=focalpoint\&fit=crop\&fp-x=0.4523\&fp-y=0.2972\&fp-z=2.4774\&w=1200\&mark-w=0.2\&mark-pad=0\&mark64=aHR0cHM6Ly9pbWFnZXMudGFuZ28udXMvc3RhdGljL21hZGUtd2l0aC10YW5nby13YXRlcm1hcmsucG5n\&ar=1920%3A942)

#### 5. Add the invitee's information and click on 'create invite'

![](https://images.tango.us/public/screenshot_66b6ced8-6135-45df-8eeb-79f8d24e4964?crop=focalpoint\&fit=crop\&fp-x=0.5000\&fp-y=0.5000\&fp-z=1.0000\&w=1200\&mark-w=0.2\&mark-pad=0\&mark64=aHR0cHM6Ly9pbWFnZXMudGFuZ28udXMvc3RhdGljL21hZGUtd2l0aC10YW5nby13YXRlcm1hcmsucG5n\&ar=1920%3A942)

#### 6. Voila! your invite link is ready to be shared with your invitee 🎉

![](https://images.tango.us/public/screenshot_706bcdf4-8034-4ea4-9121-c4e8aba49dfe?crop=focalpoint\&fit=crop\&fp-x=0.5210\&fp-y=0.5803\&fp-z=2.0000\&w=1200\&mark-w=0.2\&mark-pad=0\&mark64=aHR0cHM6Ly9pbWFnZXMudGFuZ28udXMvc3RhdGljL21hZGUtd2l0aC10YW5nby13YXRlcm1hcmsucG5n\&ar=1920%3A942)

#### This is an example of what a personalized invite looks like.

![](https://images.tango.us/public/image_6e7e7c9f-6bc8-47ae-9ed7-e7c787934dcb?crop=focalpoint\&fit=crop\&fp-x=0.5000\&fp-y=0.5000\&fp-z=1.0000\&w=1200\&mark-w=0.2\&mark-pad=0\&mark64=aHR0cHM6Ly9pbWFnZXMudGFuZ28udXMvc3RhdGljL21hZGUtd2l0aC10YW5nby13YXRlcm1hcmsucG5n\&ar=832%3A792)

***


# Intro

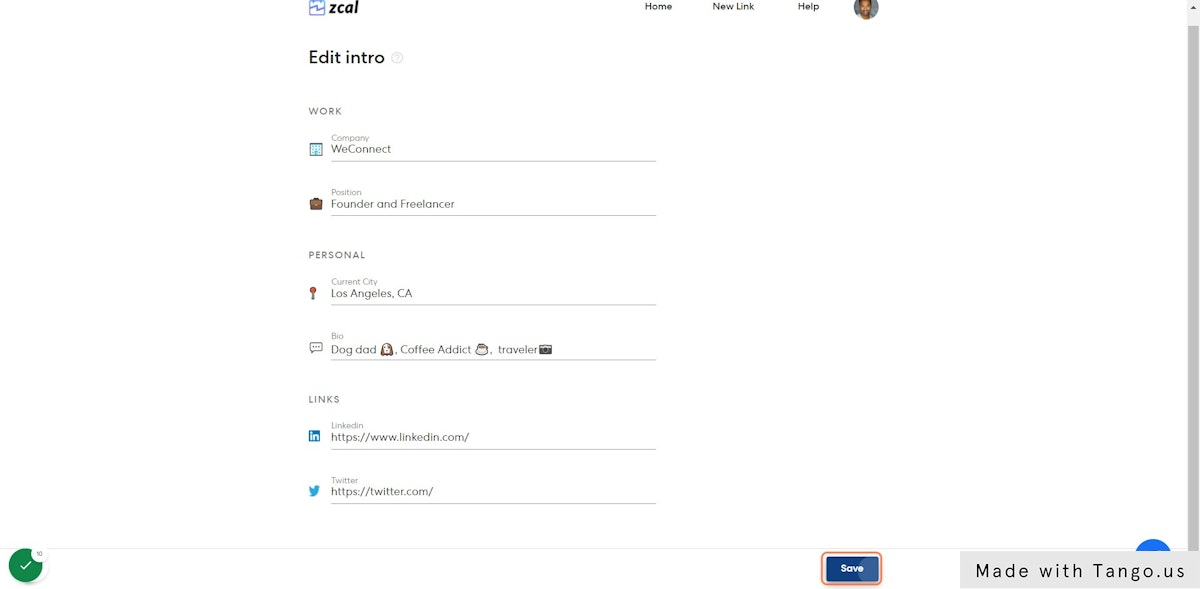
The Intro can be used to give invitees a quick summary of who you are before they book a meeting with you. It appears on your invite pages as well as your profile page.

#### 1. Click on your profile photo in the top right corner to open the main menu

<figure><img src="/files/h28YbZ4GszTe1DHsvMS9" alt=""><figcaption></figcaption></figure>

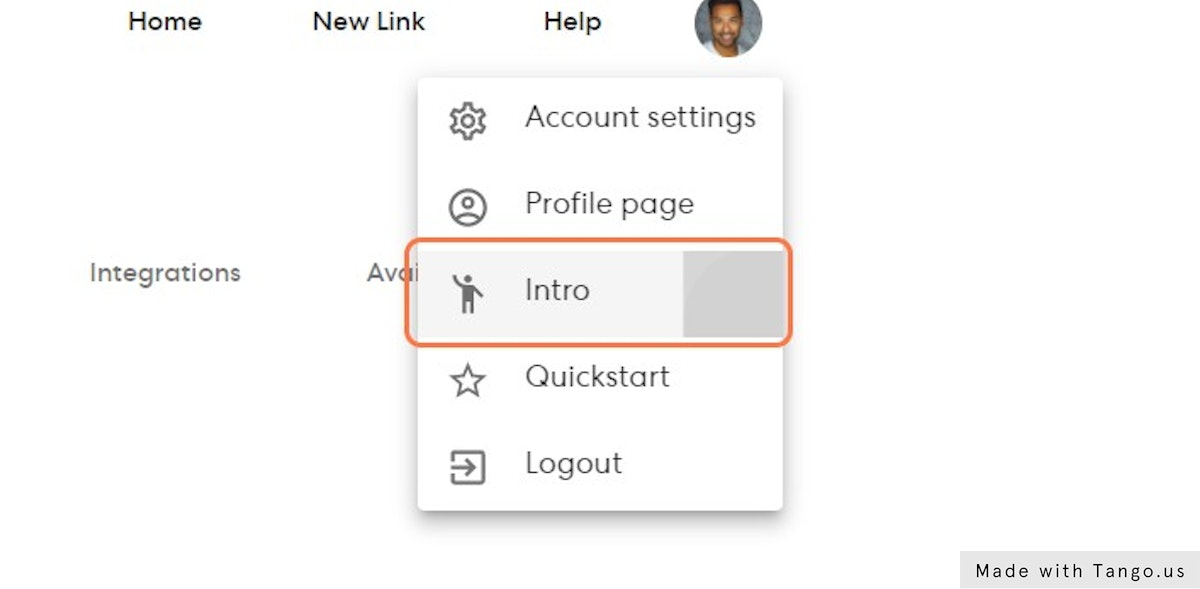
#### 2. Click the 'Intro' menu option

<figure><img src="/files/TWSWTD97rdQZbGF15z1H" alt=""><figcaption></figcaption></figure>

#### 3. Fill in the fields and Click the 'Save' button

<figure><img src="/files/2aVfTxWeneBKpZFccUWT" alt=""><figcaption></figcaption></figure>


# Profile photo

#### Your profile photo appears on your invite pages as well as your profile page.

#### 1. Log into your zcal account and Click on 'Account settings'

![](https://images.tango.us/public/screenshot_88e2e1e4-f85f-43f7-a350-c81e74d4f922?crop=focalpoint\&fit=crop\&fp-x=0.6878\&fp-y=0.0950\&fp-z=2.7157\&w=1200\&mark-w=0.2\&mark-pad=0\&mark64=aHR0cHM6Ly9pbWFnZXMudGFuZ28udXMvc3RhdGljL21hZGUtd2l0aC10YW5nby13YXRlcm1hcmsucG5n\&ar=1920%3A942)

#### 2. In the 'overview' section, you can change your photo, name, username, and also timezone

![](https://images.tango.us/public/screenshot_af376e99-a59e-4baf-9275-222398c0dab0?crop=focalpoint\&fit=crop\&fp-x=0.2779\&fp-y=0.3312\&fp-z=3.1337\&w=1200\&mark-w=0.2\&mark-pad=0\&mark64=aHR0cHM6Ly9pbWFnZXMudGFuZ28udXMvc3RhdGljL21hZGUtd2l0aC10YW5nby13YXRlcm1hcmsucG5n\&ar=1920%3A942)

#### 3. To edit name and username, click on 'Edit' button as shown

![S](https://images.tango.us/public/screenshot_2814ead6-b4d0-442d-a246-ccdc64a0eeb8?crop=focalpoint\&fit=crop\&fp-x=0.3880\&fp-y=0.3206\&fp-z=3.0328\&w=1200\&mark-w=0.2\&mark-pad=0\&mark64=aHR0cHM6Ly9pbWFnZXMudGFuZ28udXMvc3RhdGljL21hZGUtd2l0aC10YW5nby13YXRlcm1hcmsucG5n\&ar=1920%3A942)

#### 4. Once your name and/or username are edited, hit 'Save' 🎉

![](https://images.tango.us/public/screenshot_87b81c8d-e558-4ddf-b0a3-29eb5b88a38a?crop=focalpoint\&fit=crop\&fp-x=0.5000\&fp-y=0.5016\&fp-z=1.6327\&w=1200\&mark-w=0.2\&mark-pad=0\&mark64=aHR0cHM6Ly9pbWFnZXMudGFuZ28udXMvc3RhdGljL21hZGUtd2l0aC10YW5nby13YXRlcm1hcmsucG5n\&ar=1920%3A942)


# Profile Page

This is your main page where you can show all your public invites in one place

#### 1. Log into your zcal account and click on your profile image on top right

![](https://images.tango.us/public/screenshot_b779ee34-1e72-4122-9bbc-3c828ccf729f?crop=focalpoint\&fit=crop\&fp-x=0.7271\&fp-y=0.0340\&fp-z=2.9200\&w=1200\&mark-w=0.2\&mark-pad=0\&mark64=aHR0cHM6Ly9pbWFnZXMudGFuZ28udXMvc3RhdGljL21hZGUtd2l0aC10YW5nby13YXRlcm1hcmsucG5n\&ar=1920%3A942)

#### 2. Click on 'Profile page'

![](https://images.tango.us/public/edited_image_cd8a8646-cc14-472f-8ec5-405c8fa18358?crop=focalpoint\&fit=crop\&fp-x=0.5750\&fp-y=0.5753\&fp-z=0.8690\&w=1200\&mark-w=0.2\&mark-pad=0\&mark64=aHR0cHM6Ly9pbWFnZXMudGFuZ28udXMvc3RhdGljL21hZGUtd2l0aC10YW5nby13YXRlcm1hcmsucG5n\&ar=611%3A388)

#### 3. Edit your profile page and hit 'Save' at the bottom 🎉

![](https://images.tango.us/public/image_6016625e-23e9-4e78-86d3-2c7940a7e9d8?crop=focalpoint\&fit=crop\&fp-x=0.5000\&fp-y=0.5000\&fp-z=1.0000\&w=1200\&mark-w=0.2\&mark-pad=0\&mark64=aHR0cHM6Ly9pbWFnZXMudGFuZ28udXMvc3RhdGljL21hZGUtd2l0aC10YW5nby13YXRlcm1hcmsucG5n\&ar=850%3A883)

***


# Customize invite order and visibility

On your profile page you can customize the order in which invites are shown as well as which invites you want to be visible. You can edit these settings by opening <https://zcal.co/profile/edit> and scrolling to the `Invite Visibility` section.

### Reorder invites

Drag and drop invite links to reorder them.

<figure><img src="/files/mt4XHKrKkQEKYwyHjdcY" alt=""><figcaption></figcaption></figure>

### Hide invite

Click the eye icon next to an invite under the `Visible invites` column to hide it.

<figure><img src="/files/cqZpZDx21hEuoB5GM3mL" alt=""><figcaption></figcaption></figure>

### Show invite

Click the eye icon next to an invite under the `Hidden invites` column to show it.

<figure><img src="/files/8C7LLoxbNSFus2HePG9z" alt=""><figcaption></figcaption></figure>


# Invite team members

First create a team on zcal. Then follow these steps to add members to your team.

1\) Open your team members page

<figure><img src="/files/f2GDHEU8aqoIeoxPQQmE" alt=""><figcaption></figcaption></figure>

2\) Click the Invite team member button

<figure><img src="/files/FSunzUFk5mSzdZAk7EvG" alt=""><figcaption></figcaption></figure>

3\) Fill in the new team member's email address and select his [role](/teams/team-member-roles). Then click Submit.

<figure><img src="/files/95o9eKAv4W4EBp6EieHk" alt=""><figcaption></figcaption></figure>

Note that inviting a team member will increase your subscription billing as the zcal Pro plan charges per seat.


# Team member roles

Once you've created a team, you can invite new team members and assign them one of the following roles.

### Owner

Team owners have full access over every aspect of their organization.&#x20;

* Create and edit teams
* Create and edit team invites
* Add and edit team members
* View every team member's individual and team events
* Manage organization billing

### Admin

Team admins have the same set of privileges as team owners except for team creation and billing.

* Edit teams
* Create and edit team invites
* Add and edit team members
* View every team member's individual and team events

### User

Users have limited visibility and edit privileges.

* View and book team invites
* View team members
* View their own events only


# Collective Invites

**Note:** To utilize collective invites in zcal, you must first create a zcal team. You can create one here: <https://zcal.co/team>.

Collective invites in zcal are specifically designed to streamline the coordination of meetings that involve multiple team members. It efficiently **combines the availability of all team members** to Display to an invitee. This process greatly simplifies finding a time slot that is convenient for everyone involved.

When you create a collective invite in zcal, it automatically aggregates the availability of all chosen team members and presents this collective schedule to the invitee. During the setup of the Collective invite, you have the flexibility to select which team members you want as hosts.

<figure><img src="/files/jUlxrsGREaeg6xpKP3TW" alt=""><figcaption></figcaption></figure>

When time is booked with the team members, and event is created in all selected team members write calendars.

This approach removes the guesswork and back-and-forth communication often associated with scheduling group meetings, especially when dealing with busy or conflicting schedules.

Some common use cases include:

**Client Meetings:** Share your team's collective availability with clients, allowing them to choose a meeting time that suits everyone’s schedule.

**Project Collaboration:** For projects involving multiple departments or teams, use collective invites to easily identify mutual availability for essential collaborative sessions.

**Internal Team Meetings:** Coordinate internal meetings more efficiently by instantly finding overlapping available times among team members.

**Consultations and Appointments:** Ideal for client consultations or service appointments where multiple providers’ schedules need to be considered.

<br>


# Round Robin

***

**Note:** To use Round Robin invites in zcal, you must have a zcal team. Create one here: <https://zcal.co/team>

Round Robin invites in zcal offer a streamlined way to manage appointments and meetings by **evenly distributing meeting requests among team members**. This feature is ideal for ensuring that workload related to meetings is balanced across your team.

When an invitee books a Round Robin invite, zcal intelligently routes the invitation to the highest priority host who is available at the selected time. If there are multiple available hosts with the same priority, it selects the host that was least recently booked on the invite.

### When to use Round Robin invites

This feature is particularly useful for:

* **Sales Consultations:** Distribute sales calls or demos evenly among your sales team, ensuring fair opportunities for all sales representatives.
* **Customer Support Sessions:** Manage customer support schedules by evenly distributing support session requests among team members.
* **Appointments:** Balance appointments across multiple practitioners.
* **Recruitment Interviews:** In recruitment settings, evenly distribute candidate interviews among HR team members or departmental interviewers.
* **Service Appointments:** For services like financial consulting or legal advising, ensure clients are evenly assigned to available consultants or advisors.
* **Educational Counseling:** In educational institutions, balance student counseling or advisory sessions among available counselors or advisors.

### **Setting up Round Robin invites**

1. **Create a Round Robin invite:** Start by choosing the Round Robin option in the meeting setup.
2. **Select hosts:** Add team members who will be part of the Round Robin rotation.
3. **Assign host priorities:** Set each host to Low, Medium, or High priority. When higher priority hosts are available, they will always be booked before lower priority hosts.
4. **Share the invite:** When an invitee selects a time, zcal assigns the meeting to optimal host.

<figure><img src="/files/XRg4o9IH6jpUiFNAJoal" alt=""><figcaption></figcaption></figure>

<br>


# Availability troubleshooter

Want to understand why specific time slots are available or not available? See everything that zcal pulls from your calendar connections in the availability troubleshooter.

1\) Open your invite page while you are logged in. You will see a blue bar at the top of the page. Click the button with the wrench icon to open the availability troubleshooter.

<figure><img src="/files/ci7uOpQ6vRryCVi5kUm6" alt=""><figcaption></figcaption></figure>

2\) The troubleshooter will show every calendar event that zcal considers to be a conflict. It will not show events with status "Free" as these are not treated as conflicts.

<figure><img src="/files/GuXlEDiKlQfhiCMYMrZl" alt=""><figcaption></figcaption></figure>


# Set custom rolling date range

zcal invites have a default 1 month rolling date range. This date range can be customized to be longer or shorter. Note that the date range can be change for both Saved Availability and Custom Hours invites.

1\) From the zcal home page click the Edit icon on the invite you want to change.

<figure><img src="/files/aacZFldU5UmithHMV98N" alt=""><figcaption></figcaption></figure>

2\) Click the Next button.

<figure><img src="/files/2ZnIaMGgvk20eOJX3Csa" alt=""><figcaption></figcaption></figure>

3\) Click the Edit button under the Date range setting.

<figure><img src="/files/x1c3hQfVcNRtdW0Gf1L3" alt=""><figcaption></figcaption></figure>

4\) Select one of the preset options or select Custom... to enter your own rolling date range.

<figure><img src="/files/krZVYcH0kedvSJ2Qh7SZ" alt=""><figcaption></figcaption></figure>

5\) Enter a custom value in the Rolling Days field.

<figure><img src="/files/aMDo5hy6A171KIImJiIS" alt=""><figcaption></figcaption></figure>

6\) Click the Save button.

<figure><img src="/files/wTc8gRVEqlxKja3mE21v" alt=""><figcaption></figcaption></figure>

7\) Click the Next button.

<figure><img src="/files/BzRywfHm0kAYDeAPhe6h" alt=""><figcaption></figcaption></figure>

8\) Click the Save button.

<figure><img src="/files/vOmD52Ox58PiVPTvj5jQ" alt=""><figcaption></figcaption></figure>


# Edit custom hours for an invite

The availability for an invite allows you to select times you want to make available for invitees to book time with you. You have the option to set the availability using either your saved account availability or a set of custom hours.

* **Saved availability** enables you to reuse your account availability times across multiple invites. This helps maintain consistency across invites and saves time by avoiding repetitive setup. For a team invite, this setting will combine the availability of all hosts on the invite. See this help article for more information on how to set up a saved availability: [Setting account saved availability](/availability/setting-account-saved-availability)
* **Custom hours** is ideal for one-off events or special occasions where your regular weekly hours don't apply.

To edit the **custom hours** for an invite:

1\) Click the pencil icon on an invite to edit the existing invte

![Step 1 screenshot](https://images.tango.us/public/screenshot_9a8f0746-0a75-4ff5-b76d-741dbc3558d7?crop=focalpoint\&fit=crop\&fp-x=0.5333\&fp-y=0.3790\&fp-z=3.0926\&w=1200\&mark-w=0.2\&mark-pad=0\&mark64=aHR0cHM6Ly9pbWFnZXMudGFuZ28udXMvc3RhdGljL21hZGUtd2l0aC10YW5nby13YXRlcm1hcmsucG5n\&ar=1920%3A942)

2\) Click on 'Next' to go to the 2nd page where the time availability section is present

![Step 2 screenshot](https://images.tango.us/public/screenshot_08d1af2d-0017-423e-9da2-355f3c778f15?crop=focalpoint\&fit=crop\&fp-x=0.5630\&fp-y=0.7764\&fp-z=2.0000\&w=1200\&mark-w=0.2\&mark-pad=0\&mark64=aHR0cHM6Ly9pbWFnZXMudGFuZ28udXMvc3RhdGljL21hZGUtd2l0aC10YW5nby13YXRlcm1hcmsucG5n\&ar=1920%3A942)

3\) Select "Custom hours." Selecting the "Saved availability" option will make the invite automatically sync availability with your saved account availability setting. Selecting the "Custom hours" option will allow you to set the availability for this just this invite.

<figure><img src="/files/4hpK8Fk9tWnVHnV5jPOS" alt=""><figcaption></figcaption></figure>

4\) When setting "Custom hours" availability, set recurring weekly availabilities  on the left hand side. Add any date specific availabilities to the right hand side - any date specific setting here will override the corresponding weekly hour. If you do not want to show any availability for the date, clear the time intervals for that date.

<div><figure><img src="/files/2G4g5uWRvxox3gDzwMur" alt=""><figcaption><p>Show no availability on a specific day by not selecting any intervals</p></figcaption></figure> <figure><img src="/files/cGGsYOJ9IPAiDaU23rzf" alt=""><figcaption><p>Show specific availability on certain days by selecting intervals</p></figcaption></figure></div>

5\) 🎉Voila! your invite is edited with new times and can be shared with your invitees.

***


# Setting account saved availability

The account saved availability feature lets you efficiently manage and reuse a global availability configuration across multiple invite links.

Once you’ve configured your saved account availability, it will automatically sync to all your invites that have the saved availability option selected. Any changes you make to your saved availability will be reflected across all linked invites.

Team invites can be configured to combine the saved availability of multiple team members, ensuring the invite always reflects the most up to date availability of each host.

### Setting Account Saved Availability

1. &#x20;Click on your profile icon on the top right.

![](https://images.tango.us/workflows/6ec29a9a-a617-4d1e-91f7-d1e2c7cc412a/steps/12c0cea3-94fd-4f4f-a474-770aca9473a1/785c182d-b260-4bc8-8c86-fe8b64ac1219.png?crop=focalpoint\&fit=crop\&fp-x=0.7839\&fp-y=0.0425\&fp-z=2.8322\&w=1200\&mark-w=0.2\&mark-pad=0\&mark64=aHR0cHM6Ly9pbWFnZXMudGFuZ28udXMvc3RhdGljL21hZGUtd2l0aC10YW5nby13YXRlcm1hcmsucG5n\&ar=1920%3A942)

2. Click on "Account"

![](https://images.tango.us/workflows/6ec29a9a-a617-4d1e-91f7-d1e2c7cc412a/steps/44916ec5-86d7-4e44-8165-18cb126864e7/c2f9839d-0b6d-4fb5-bf0a-df093fae0cd8.png?crop=focalpoint\&fit=crop\&fp-x=0.7516\&fp-y=0.1168\&fp-z=2.7496\&w=1200\&mark-w=0.2\&mark-pad=0\&mark64=aHR0cHM6Ly9pbWFnZXMudGFuZ28udXMvc3RhdGljL21hZGUtd2l0aC10YW5nby13YXRlcm1hcmsucG5n\&ar=1920%3A942)

3. Click on "Availability"

![](https://images.tango.us/workflows/6ec29a9a-a617-4d1e-91f7-d1e2c7cc412a/steps/d6890558-af02-478d-8d57-63ddc720df01/5104717b-2180-41d6-bf55-eb39d71abc58.png?crop=focalpoint\&fit=crop\&fp-x=0.5337\&fp-y=0.3560\&fp-z=1.4742\&w=1200\&mark-w=0.2\&mark-pad=0\&mark64=aHR0cHM6Ly9pbWFnZXMudGFuZ28udXMvc3RhdGljL21hZGUtd2l0aC10YW5nby13YXRlcm1hcmsucG5n\&ar=1920%3A942)

4. Set your saved availability. \
   On the left hand side, you can set hours for your normal recurring weekly availability. \
   On the right hand side, you can set any date-specific hours - these will override any weekly availability on the specified day.

<figure><img src="/files/TDQQo9FEyBSTA2g1n0p3" alt=""><figcaption></figcaption></figure>

***


# Set invite date range to specific dates

## Set Specific dates for your invite availability

#### 1. Click on Date Range while setting the invite (or edit in the existing one)

![](https://images.tango.us/public/screenshot_f58653f0-3784-4e73-b90e-9bbc314cbc73?crop=focalpoint\&fit=crop\&fp-x=0.4008\&fp-y=0.4889\&fp-z=1.6537\&w=1200\&mark-w=0.2\&mark-pad=0\&mark64=aHR0cHM6Ly9pbWFnZXMudGFuZ28udXMvc3RhdGljL21hZGUtd2l0aC10YW5nby13YXRlcm1hcmsucG5n\&ar=1920%3A942)

#### 2. Select 'Custom'

![](https://images.tango.us/public/screenshot_b387caf7-385f-4a10-b64e-4a76c6b36cfa?crop=focalpoint\&fit=crop\&fp-x=0.4008\&fp-y=0.5924\&fp-z=1.6537\&w=1200\&mark-w=0.2\&mark-pad=0\&mark64=aHR0cHM6Ly9pbWFnZXMudGFuZ28udXMvc3RhdGljL21hZGUtd2l0aC10YW5nby13YXRlcm1hcmsucG5n\&ar=1920%3A942)

#### 3. Click on Specific dates

![](https://images.tango.us/public/screenshot_37150147-65a3-45e6-987a-b7237f04a1f9?crop=focalpoint\&fit=crop\&fp-x=0.5094\&fp-y=0.4873\&fp-z=1.6667\&w=1200\&mark-w=0.2\&mark-pad=0\&mark64=aHR0cHM6Ly9pbWFnZXMudGFuZ28udXMvc3RhdGljL21hZGUtd2l0aC10YW5nby13YXRlcm1hcmsucG5n\&ar=1920%3A942)

#### 4. Select your desired date range

![](https://images.tango.us/public/screenshot_bd863ba2-75b5-4b90-a823-ecb2d61ed1bb?crop=focalpoint\&fit=crop\&fp-x=0.5460\&fp-y=0.7085\&fp-z=2.0000\&w=1200\&mark-w=0.2\&mark-pad=0\&mark64=aHR0cHM6Ly9pbWFnZXMudGFuZ28udXMvc3RhdGljL21hZGUtd2l0aC10YW5nby13YXRlcm1hcmsucG5n\&ar=1920%3A942)

#### 5. Select each date to add your available times in 'Select availability'

![](https://images.tango.us/public/screenshot_d1de9de4-0f9c-41d0-ab8e-6ec1880da64d?crop=focalpoint\&fit=crop\&fp-x=0.4945\&fp-y=0.6189\&fp-z=1.3070\&w=1200\&mark-w=0.2\&mark-pad=0\&mark64=aHR0cHM6Ly9pbWFnZXMudGFuZ28udXMvc3RhdGljL21hZGUtd2l0aC10YW5nby13YXRlcm1hcmsucG5n\&ar=1920%3A942)

#### 6. Add your available times for each date and hit 'Apply'

![](https://images.tango.us/public/screenshot_fe93e418-e7c3-43d2-b443-40737b9dccae?crop=focalpoint\&fit=crop\&fp-x=0.5000\&fp-y=0.5000\&fp-z=1.0000\&w=1200\&mark-w=0.2\&mark-pad=0\&mark64=aHR0cHM6Ly9pbWFnZXMudGFuZ28udXMvc3RhdGljL21hZGUtd2l0aC10YW5nby13YXRlcm1hcmsucG5n\&ar=1920%3A942)

#### 7. Click on Next to complete the remaining invite fields and share it with your guests 🎉

![](https://images.tango.us/public/screenshot_f2c5fc33-bdde-446b-ab95-acbc1040f5ce?crop=focalpoint\&fit=crop\&fp-x=0.5000\&fp-y=0.5000\&fp-z=1.0000\&w=1200\&mark-w=0.2\&mark-pad=0\&mark64=aHR0cHM6Ly9pbWFnZXMudGFuZ28udXMvc3RhdGljL21hZGUtd2l0aC10YW5nby13YXRlcm1hcmsucG5n\&ar=1920%3A942)


# Update Date Range

See the steps below to update your date range for an invite.

<mark style="color:blue;">**1. Click on the 'Edit' button of the invite on your zcal home page.**</mark>

<img src="https://images.tango.us/workflows/b7ddaa59-349f-4e61-b7f7-ef87ea474940/steps/591dc5af-3b90-45f3-8f6c-c7b6ca8650c0/36dacca4-6470-4c7c-a301-21aab69b99bb.png?crop=focalpoint&#x26;fit=crop&#x26;fp-x=0.4736&#x26;fp-y=0.5021&#x26;fp-z=2.0000&#x26;w=1200&#x26;border=2%2CF4F2F7&#x26;border-radius=8%2C8%2C8%2C8&#x26;border-radius-inner=8%2C8%2C8%2C8&#x26;blend-align=bottom&#x26;blend-mode=normal&#x26;blend-x=0&#x26;blend-w=1200&#x26;blend64=aHR0cHM6Ly9pbWFnZXMudGFuZ28udXMvc3RhdGljL21hZGUtd2l0aC10YW5nby13YXRlcm1hcmstdjIucG5n&#x26;mark-x=786&#x26;mark-y=400&#x26;m64=aHR0cHM6Ly9pbWFnZXMudGFuZ28udXMvc3RhdGljL2JsYW5rLnBuZz9tYXNrPWNvcm5lcnMmYm9yZGVyPTYlMkNGRjc0NDImdz03NCZoPTc0JmZpdD1jcm9wJmNvcm5lci1yYWRpdXM9MTA%3D" alt="Step 1 screenshot" width="563">

#### <mark style="color:blue;">2. Click on 'Next' to go to page#2 of the invite.</mark>

<img src="https://images.tango.us/workflows/b7ddaa59-349f-4e61-b7f7-ef87ea474940/steps/fe727efd-e07f-4852-8bed-89dd090d3912/f3429e8f-71e2-4dcb-91e2-884ea2dddd88.png?crop=focalpoint&#x26;fit=crop&#x26;fp-x=0.5000&#x26;fp-y=0.5000&#x26;w=1200&#x26;border=2%2CF4F2F7&#x26;border-radius=8%2C8%2C8%2C8&#x26;border-radius-inner=8%2C8%2C8%2C8&#x26;blend-align=bottom&#x26;blend-mode=normal&#x26;blend-x=0&#x26;blend-w=1200&#x26;blend64=aHR0cHM6Ly9pbWFnZXMudGFuZ28udXMvc3RhdGljL21hZGUtd2l0aC10YW5nby13YXRlcm1hcmstdjIucG5n&#x26;mark-x=954&#x26;mark-y=755&#x26;m64=aHR0cHM6Ly9pbWFnZXMudGFuZ28udXMvc3RhdGljL2JsYW5rLnBuZz9tYXNrPWNvcm5lcnMmYm9yZGVyPTQlMkNGRjc0NDImdz04NSZoPTQ0JmZpdD1jcm9wJmNvcm5lci1yYWRpdXM9MTA%3D" alt="Step 2 screenshot" width="563">

#### <mark style="color:blue;">3. Click on the dropdown in the 'Date Range' field to see different options for extending the date range.</mark>

<img src="https://images.tango.us/workflows/b7ddaa59-349f-4e61-b7f7-ef87ea474940/steps/cbd2023b-0e7f-4f21-ac66-e579b8d5a497/3de32176-9513-4947-8306-a0c8b420ea7e.png?crop=focalpoint&#x26;fit=crop&#x26;fp-x=0.3631&#x26;fp-y=0.4904&#x26;fp-z=1.3737&#x26;w=1200&#x26;border=2%2CF4F2F7&#x26;border-radius=8%2C8%2C8%2C8&#x26;border-radius-inner=8%2C8%2C8%2C8&#x26;blend-align=bottom&#x26;blend-mode=normal&#x26;blend-x=0&#x26;blend-w=1200&#x26;blend64=aHR0cHM6Ly9pbWFnZXMudGFuZ28udXMvc3RhdGljL21hZGUtd2l0aC10YW5nby13YXRlcm1hcmstdjIucG5n&#x26;mark-x=246&#x26;mark-y=379&#x26;m64=aHR0cHM6Ly9pbWFnZXMudGFuZ28udXMvc3RhdGljL2JsYW5rLnBuZz9tYXNrPWNvcm5lcnMmYm9yZGVyPTYlMkNGRjc0NDImdz03MDUmaD01MCZmaXQ9Y3JvcCZjb3JuZXItcmFkaXVzPTEw" alt="Step 3 screenshot" width="563">

#### <mark style="color:blue;">4. Select the date range setting from our preset options or click on 'custom' to modify it per your preference.</mark>

<img src="https://images.tango.us/workflows/b7ddaa59-349f-4e61-b7f7-ef87ea474940/steps/466e245f-8216-4d7e-afdf-cdba5d316303/210bb24e-7bbc-4749-b5c4-9eaefc292afb.png?crop=focalpoint&#x26;fit=crop&#x26;fp-x=0.3624&#x26;fp-y=0.5760&#x26;fp-z=1.3737&#x26;w=1200&#x26;border=2%2CF4F2F7&#x26;border-radius=8%2C8%2C8%2C8&#x26;border-radius-inner=8%2C8%2C8%2C8&#x26;blend-align=bottom&#x26;blend-mode=normal&#x26;blend-x=0&#x26;blend-w=1200&#x26;blend64=aHR0cHM6Ly9pbWFnZXMudGFuZ28udXMvc3RhdGljL21hZGUtd2l0aC10YW5nby13YXRlcm1hcmstdjIucG5n&#x26;mark-x=245&#x26;mark-y=374&#x26;m64=aHR0cHM6Ly9pbWFnZXMudGFuZ28udXMvc3RhdGljL2JsYW5rLnBuZz9tYXNrPWNvcm5lcnMmYm9yZGVyPTYlMkNGRjc0NDImdz03MDUmaD01OSZmaXQ9Y3JvcCZjb3JuZXItcmFkaXVzPTEw" alt="Step 4 screenshot" width="563">

#### <mark style="color:blue;">5. Click on Save once you have selected your preferred date range option.</mark>

<img src="https://images.tango.us/workflows/b7ddaa59-349f-4e61-b7f7-ef87ea474940/steps/a9ac0ea7-b07d-41a9-91e3-41c733ecdb50/d8d9e8da-07f8-4bd1-840e-a46ac1c0a3d9.png?crop=focalpoint&#x26;fit=crop&#x26;fp-x=0.5000&#x26;fp-y=0.5000&#x26;w=1200&#x26;border=2%2CF4F2F7&#x26;border-radius=8%2C8%2C8%2C8&#x26;border-radius-inner=8%2C8%2C8%2C8&#x26;blend-align=bottom&#x26;blend-mode=normal&#x26;blend-x=0&#x26;blend-w=1200&#x26;blend64=aHR0cHM6Ly9pbWFnZXMudGFuZ28udXMvc3RhdGljL21hZGUtd2l0aC10YW5nby13YXRlcm1hcmstdjIucG5n&#x26;mark-x=787&#x26;mark-y=489&#x26;m64=aHR0cHM6Ly9pbWFnZXMudGFuZ28udXMvc3RhdGljL2JsYW5rLnBuZz9tYXNrPWNvcm5lcnMmYm9yZGVyPTQlMkNGRjc0NDImdz04NiZoPTQ0JmZpdD1jcm9wJmNvcm5lci1yYWRpdXM9MTA%3D" alt="Step 5 screenshot" width="563">

#### <mark style="color:blue;">6. Click on 'Next' at the bottom of the page to move to page #3 and 'Save' the invite.</mark>

<img src="https://images.tango.us/workflows/b7ddaa59-349f-4e61-b7f7-ef87ea474940/steps/4b439504-eeff-4fbf-bfef-86c3bc0eae5e/f5fd3039-a1d4-4c3a-9518-0fdf68a19edd.png?crop=focalpoint&#x26;fit=crop&#x26;fp-x=0.7071&#x26;fp-y=0.7746&#x26;fp-z=1.8208&#x26;w=1200&#x26;border=2%2CF4F2F7&#x26;border-radius=8%2C8%2C8%2C8&#x26;border-radius-inner=8%2C8%2C8%2C8&#x26;blend-align=bottom&#x26;blend-mode=normal&#x26;blend-x=0&#x26;blend-w=1200&#x26;blend64=aHR0cHM6Ly9pbWFnZXMudGFuZ28udXMvc3RhdGljL21hZGUtd2l0aC10YW5nby13YXRlcm1hcmstdjIucG5n&#x26;mark-x=793&#x26;mark-y=711&#x26;m64=aHR0cHM6Ly9pbWFnZXMudGFuZ28udXMvc3RhdGljL2JsYW5rLnBuZz9tYXNrPWNvcm5lcnMmYm9yZGVyPTYlMkNGRjc0NDImdz0xNTQmaD04MCZmaXQ9Y3JvcCZjb3JuZXItcmFkaXVzPTEw" alt="Step 6 screenshot" width="563">

#### <mark style="color:blue;">7. Copy the Link and start sharing with your invitees.</mark> 🎉

<img src="https://images.tango.us/workflows/b7ddaa59-349f-4e61-b7f7-ef87ea474940/steps/e95c8a43-1125-4d59-b30a-c5eaf059d808/0131f8ab-00d9-4fe3-8b91-6e8584d4cce3.png?crop=focalpoint&#x26;fit=crop&#x26;fp-x=0.5128&#x26;fp-y=0.3526&#x26;fp-z=1.5932&#x26;w=1200&#x26;border=2%2CF4F2F7&#x26;border-radius=8%2C8%2C8%2C8&#x26;border-radius-inner=8%2C8%2C8%2C8&#x26;blend-align=bottom&#x26;blend-mode=normal&#x26;blend-x=0&#x26;blend-w=1200&#x26;blend64=aHR0cHM6Ly9pbWFnZXMudGFuZ28udXMvc3RhdGljL21hZGUtd2l0aC10YW5nby13YXRlcm1hcmstdjIucG5n&#x26;mark-x=807&#x26;mark-y=321&#x26;m64=aHR0cHM6Ly9pbWFnZXMudGFuZ28udXMvc3RhdGljL2JsYW5rLnBuZz9tYXNrPWNvcm5lcnMmYm9yZGVyPTYlMkNGRjc0NDImdz0xNjQmaD03MiZmaXQ9Y3JvcCZjb3JuZXItcmFkaXVzPTEw" alt="Step 7 screenshot" width="563">


# Block out of office (OOO) days

Going on vacation? Set the days when you're unavailable to block them from appearing on your invite pages.

1\) Navigate to <https://zcal.co/availability>

2\) Click "Add date-specific hours"

<figure><img src="/files/jRwBmeyF05beu0HuWF1g" alt=""><figcaption></figcaption></figure>

3\) Click all the dates when you'll be out

<figure><img src="/files/SONpmz7mRz7fFnxaQSfc" alt=""><figcaption></figcaption></figure>

4\) Turn on the "Mark as unavailable" switch

<figure><img src="/files/RiQt7bmYHBTl8rSPXtzV" alt=""><figcaption></figcaption></figure>

5\) Click "Apply"

<figure><img src="/files/ZtDyr2OaEGvQfQRClzio" alt=""><figcaption></figcaption></figure>

6\) Make sure your invites have their availability set to "Saved availability" not "Custom hours."


# Sync multiple calendars in zcal

When you have multiple calendars and want to sync them all to have zcal read your availability across all of them for any conflict(s), you can follow the steps outlined below to achieve this.

#### 1. Once you log in, click on 'Account settings'

![](https://images.tango.us/public/screenshot_5d3714bb-d948-4231-a497-8383572b4732?crop=focalpoint\&fit=crop\&fp-x=0.6500\&fp-y=0.0738\&fp-z=2.5668\&w=1200\&mark-w=0.2\&mark-pad=0\&mark64=aHR0cHM6Ly9pbWFnZXMudGFuZ28udXMvc3RhdGljL21hZGUtd2l0aC10YW5nby13YXRlcm1hcmsucG5n\&ar=1920%3A969)

#### 2. Click on 'Calendars'

![](https://images.tango.us/public/screenshot_92e70b10-385a-4352-b57d-f6d52786e414?crop=focalpoint\&fit=crop\&fp-x=0.4102\&fp-y=0.1486\&fp-z=2.8029\&w=1200\&mark-w=0.2\&mark-pad=0\&mark64=aHR0cHM6Ly9pbWFnZXMudGFuZ28udXMvc3RhdGljL21hZGUtd2l0aC10YW5nby13YXRlcm1hcmsucG5n\&ar=1920%3A969)

#### 3. Click on 'Add calendar connection' at the bottom of the page

![](https://images.tango.us/public/edited_image_eae8912a-edcb-4b4d-a975-52e78dd0d8ec?crop=focalpoint\&fit=crop\&fp-x=0.3644\&fp-y=0.6656\&fp-z=2.4483\&w=1200\&mark-w=0.2\&mark-pad=0\&mark64=aHR0cHM6Ly9pbWFnZXMudGFuZ28udXMvc3RhdGljL21hZGUtd2l0aC10YW5nby13YXRlcm1hcmsucG5n\&ar=1918%3A968)

#### 4. Click on 'Connect' for the calendar you want to sync

![](https://images.tango.us/public/screenshot_03fc6c48-ca6a-46dc-a6f6-aea6af5f28a4?crop=focalpoint\&fit=crop\&fp-x=0.5341\&fp-y=0.5142\&fp-z=3.0000\&w=1200\&mark-w=0.2\&mark-pad=0\&mark64=aHR0cHM6Ly9pbWFnZXMudGFuZ28udXMvc3RhdGljL21hZGUtd2l0aC10YW5nby13YXRlcm1hcmsucG5n\&ar=1920%3A969)

#### 5. Connect to the account which is associated with your preferred calendar

![](https://images.tango.us/public/edited_image_b5aac57a-8fd3-4774-8996-ef67e828295d?crop=focalpoint\&fit=crop\&fp-x=0.4964\&fp-y=0.5550\&fp-z=2.8741\&w=1200\&mark-w=0.2\&mark-pad=0\&mark64=aHR0cHM6Ly9pbWFnZXMudGFuZ28udXMvc3RhdGljL21hZGUtd2l0aC10YW5nby13YXRlcm1hcmsucG5n\&ar=1918%3A968)

#### 6. Grant all permissions to complete the syncing process with your calendar account

![](https://images.tango.us/public/screenshot_7011f4df-9387-4346-8317-58d0d39ce56d?crop=focalpoint\&fit=crop\&fp-x=0.5484\&fp-y=0.7668\&fp-z=2.5330\&w=1200\&mark-w=0.2\&mark-pad=0\&mark64=aHR0cHM6Ly9pbWFnZXMudGFuZ28udXMvc3RhdGljL21hZGUtd2l0aC10YW5nby13YXRlcm1hcmsucG5n\&ar=1920%3A969)

#### 7. Your preferred calendar is now synced and can be seen in the calendar connections

<figure><img src="/files/RPwufCE0dVDnmelv7TRZ" alt="" width="563"><figcaption></figcaption></figure>

#### 8. You can edit the 'Read calendars' that you would like zcal to read from for scheduling conflicts

![](https://images.tango.us/public/edited_image_aa874648-cbef-49c4-b3f1-2c8169dc5166?crop=focalpoint\&fit=crop\&fp-x=0.3846\&fp-y=0.2461\&fp-z=3.0965\&w=1200\&mark-w=0.2\&mark-pad=0\&mark64=aHR0cHM6Ly9pbWFnZXMudGFuZ28udXMvc3RhdGljL21hZGUtd2l0aC10YW5nby13YXRlcm1hcmsucG5n\&ar=1918%3A968)

#### 9. To edit, just check or uncheck the preferred calendars and hit 'Save'

![](https://images.tango.us/public/edited_image_36af3d55-ab1e-44c4-bf88-972712014b8e?crop=focalpoint\&fit=crop\&fp-x=0.5643\&fp-y=0.5103\&fp-z=1.9860\&w=1200\&mark-w=0.2\&mark-pad=0\&mark64=aHR0cHM6Ly9pbWFnZXMudGFuZ28udXMvc3RhdGljL21hZGUtd2l0aC10YW5nby13YXRlcm1hcmsucG5n\&ar=1918%3A968)

#### 10. You can also select which specific calendar you would like zcal to write the events to

![](https://images.tango.us/public/edited_image_e5d4af78-df9f-4620-853f-1af69ac38b2b?crop=focalpoint\&fit=crop\&fp-x=0.3826\&fp-y=0.4579\&fp-z=3.0965\&w=1200\&mark-w=0.2\&mark-pad=0\&mark64=aHR0cHM6Ly9pbWFnZXMudGFuZ28udXMvc3RhdGljL21hZGUtd2l0aC10YW5nby13YXRlcm1hcmsucG5n\&ar=1918%3A968)

#### 11. To edit 'Write calendar', select your preferred calendar account from the drop down and hit 'save'

![](https://images.tango.us/public/edited_image_17c08c3a-85d0-4474-a94a-76617de9b7cd?crop=focalpoint\&fit=crop\&fp-x=0.5072\&fp-y=0.4750\&fp-z=1.9464\&w=1200\&mark-w=0.2\&mark-pad=0\&mark64=aHR0cHM6Ly9pbWFnZXMudGFuZ28udXMvc3RhdGljL21hZGUtd2l0aC10YW5nby13YXRlcm1hcmsucG5n\&ar=1918%3A968)


# Connecting Apple Calendar

Sync your Apple Calendar with our scheduling platform to prevent double-bookings and keep your schedule in sync.

**IMPORTANT:** This integration requires an **app-specific password - not your regular Apple ID password**. We'll guide you through creating this secure password below.

Additionally you need to enable [**two-factor authentication**](https://support.apple.com/en-us/102660) to generate an app specifc password (if you haven’t done so already)

### Step 1: Generate an App-Specific Password

1. Login to your Apple account <https://account.apple.com/sign-in>
2. Click on "App-Specific Passwords". This will allow you to generate a password to use specifically for zcal.\
   ![](/files/dfAlEFB8r0AAJZfBhx8c)
3. Create a new password. Enter any name you would like (e.g "zcal integration")\
   ![](/files/aiWRoJtse3TqjutvXQMT)
4. Copy and save the generated password - you'll need this for the zcal integration\
   ![](/files/dY84zUhErf4P2slNBmHT)

### Step 2: Connect zcal to your Apple Calendar

1. Login to your zcal account and go to <https://zcal.co/account/calendars>
2. Select "Add Calendar connection" and select Apple Calendar.
3. Enter your Apple ID email and the App-specific password you just generated


# Custom Domain

#### Overview

Custom domains allow you to host your scheduling pages, profiles, and polls on your own branded domain instead of using the default zcal.co domain. This provides a professional, fully-branded experience for your clients.

#### Benefits

* **Brand Consistency**: Keep your clients on your domain throughout the entire scheduling experience
* **Professional Image**: Use your company domain (e.g., `meet.yourcompany.com`) instead of generic scheduling links
* **Trust**: Clients are more likely to trust and engage with links from your verified domain
* **Custom URLs**: All your scheduling links, profile pages, and polls will use your custom domain

#### Examples

**Without Custom Domain:**

* `https://zcal.co/yourusername`
* `https://zcal.co/yourusername/30min`

**With Custom Domain:**

* `https://meet.yourcompany.com`
* `https://meet.yourcompany.com/30min`

#### Requirements

* **Business Plan**: Custom domains are available on the Business tier
* **Domain Access**: You need access to your domain's DNS settings
* **Subdomain**: You must use a subdomain (e.g., `calendar.company.com`, not `company.com`)

***

### Setup Instructions

#### Step 1: Add Your Custom Domain

1. Log in to your account. For adding a custom domain to your individual booking links navigate to  <https://zcal.co/account> . For adding a a custom domain to a team, navigate to <https://zcal.co/teams> and select the team you want to add a custom domain for.
2. Click the **Add Domain** button
3. Enter your subdomain (e.g., `meet.yourcompany.com`)
4. Click **Save**

**Important Notes:**

* You must use a subdomain (minimum 3 parts: `subdomain.domain.com`)
* The domain must not already be in use by another user or team

#### Step 2: Configure DNS Records

After adding your domain, you'll need to add a CNAME record to your domain's DNS settings.

**DNS Record Details**

| Record Type | Name/Host          | Value/Target     |
| ----------- | ------------------ | ---------------- |
| CNAME       | `[your-subdomain]` | `custom.zcal.co` |

**Example:** If your custom domain is `meet.yourcompany.com`, your DNS settings would be:

* **Type**: CNAME
* **Name**: `meet` (just the subdomain part)
* **Value**: `custom.zcal.co`
* **TTL**: Automatic (or 3600 seconds)

**Where to Add DNS Records**

The location of DNS settings depends on where your domain is hosted. The screenshot below is what adding the DNS record would look like on Cloudflare for `book.mycompany.com`:

<figure><img src="/files/6yqmjZ16JmzuIZiHDN19" alt=""><figcaption></figcaption></figure>

**Tips:**

* Copy the values exactly as shown in your dashboard
* Some DNS providers auto-append your root domain, so you may only need to enter the subdomain part

#### Step 3: Verify Your Domain

1. After adding the DNS record, return to your Custom Domain settings
2. Click the **Verify Domain** button
3. Wait for verification to complete

**DNS Propagation Time:**

* DNS changes typically take 5-15 minutes to propagate
* In some cases, it can take up to 48 hours
* You can retry verification after waiting a few minutes

**Verification Process**

When you verify your domain:

1. Our system checks that the CNAME record points to `custom.zcal.co`
2. If verified, we automatically provision an SSL certificate (HTTPS)
3. Your domain status changes to "Verified" and becomes active
4. All your scheduling links will now use your custom domain

***

### Features & Functionality

#### What Works on Custom Domains

Once your custom domain is verified, the following pages will be accessible:

**Individual User Domains**

* **Profile Page**: `https://meet.yourcompany.com/`
* **Scheduling Pages**: `https://meet.yourcompany.com/30min`
* **Event Pages**: `https://meet.yourcompany.com/e/[event-id]`
* **Reschedule**: `https://meet.yourcompany.com/e/[event-id]/reschedule`
* **Cancel**: `https://meet.yourcompany.com/e/[event-id]/cancel`

**Team Domains**

* **Team Profile**: `https://meet.company.com/`
* **Team Invite Pages**: `https://meet.company.com/meeting-type`
* **Round Robin**: Works with assigned host routing
* **Collective Events**: Works with all hosts
* **Group Polls**: `https://meet.company.com/m/[invite-id]`

#### URL Structure

With a custom domain, your URL structure changes:

**Standard Domain:**

```
https://zcal.co/username/invite-slug
```

**Custom Domain:**

```
https://meet.company.com/invite-slug
```

The username is automatically resolved from your custom domain, so it's not needed in the URL.

#### Email Notifications

Event confirmation emails, reminders, and follow-ups will continue to be sent from Zcal unless you've also configured a custom email domain (separate Business tier feature).

Event confirmations and reminders sent to invitees will include your custom domain in any scheduling links.

#### Routing Priority

Custom domains take precedence over regular routing. When someone visits your custom domain:

1. The app detects it's a custom domain (not zcal.co)
2. It looks up which user/team owns that domain
3. It routes to their scheduling pages automatically
4. All internal links stay on the custom domain

***

### Troubleshooting

If issues adding your custom domain persist, please reach out to <support@zcal.co> for additional assistance.&#x20;

#### Verification Failed

**Problem**: When you click "Verify Domain," you receive an error message.

**Common Causes:**

1. **DNS Not Propagated Yet**: Wait 5-15 minutes and try again
2. **Incorrect CNAME Record**: Double-check the record points to `custom.zcal.co`
3. **Wrong Record Type**: Make sure you added a CNAME record, not an A record
4. **DNS Provider Issues**: Some providers have delays or caching

**Solutions:**

* Wait at least 15 minutes after adding the DNS record
* Use a DNS checker tool to verify the record is visible (e.g., whatsmydns.net)
* Check for typos in the CNAME value
* Remove any existing A records for the same subdomain
* Contact your DNS provider if issues persist after 24 hours

#### Domain Already in Use

**Problem**: You receive an error "Domain is already in use."

**Cause**: The domain is currently configured for another user or team account.

**Solution:**

* If you previously used this domain with another account, remove it from that account first
* Only one user or team can use a specific domain at a time
* If you believe this is an error, contact support

#### Domain Not Loading After Verification

**Problem**: Your domain is verified, but pages don't load.

**Troubleshooting Steps:**

1. Clear your browser cache
2. Try accessing the domain in an incognito/private window
3. Check if the domain is marked as "Active" in your settings
4. Wait up to 10 minutes for our CDN cache to update
5. Ensure you have an active Business plan subscription

#### Invalid Domain Format Error

**Problem**: You receive "Invalid hostname format" or "Must be subdomain."

**Solution:**

* Use a subdomain with at least 3 parts: `calendar.company.com`
* Remove any protocols (`http://`, `https://`)
* Remove any paths (`/path`)
* Don't use `www` as your subdomain
* Check for special characters (only letters, numbers, hyphens, and dots are allowed)

#### DNS Propagation Taking Too Long

**Problem**: It's been several hours and DNS still isn't propagating.

**Possible Issues:**

1. **High TTL**: If your DNS records have a high TTL (Time To Live), it can delay propagation
2. **Cloudflare Proxy**: If you're using Cloudflare, ensure the record is not proxied (grey cloud)
3. **Typo in Record**: Even a small typo prevents verification

**Solutions:**

* Lower the TTL on your DNS records to 300 seconds (5 minutes)
* If using Cloudflare, click the orange cloud to make it grey (DNS only)
* Delete and re-add the CNAME record to force an update
* Contact your DNS provider

***

### Management & Administration

#### Viewing Domain Status

Your custom domain can have three states:

1. **Pending**: Domain added but not yet verified
   * DNS records need to be configured
   * The "Verify Domain" button is available
2. **Verified**: Domain is verified and active
   * SSL certificate is provisioned
   * All links use your custom domain
   * Shows green checkmark or "Verified" badge
3. **Not Configured**: No custom domain set up
   * Default zcal.co domain is used

#### Updating Your Domain

To change your custom domain:

1. Click the menu icon (⋮) next to your current domain
2. Select **Delete**
3. Add your new domain following the setup instructions above

**Note**: You can only have one custom domain at a time per user/team.

**Effects of Removal:**

* All links will revert to zcal.co URLs
* Previously shared custom domain links will stop working
* DNS records can safely be deleted from your provider (recommended)

#### Team vs. User Domains

**User Domains:**

* Configured in individual user settings
* Requires the account owner to have a Business plan
* Shows the user's profile page as the home page
* All invite links use the format: `domain.com/invite-slug`

**Team Domains:**

* Configured in team settings
* Shows the team profile page as the home page
* Team member invites use the format: `domain.com/invite-slug`
* Supports round-robin, collective, and all team features

**Important**: A team owner's Business plan enables custom domains for the entire team, the feature is configured at the team level, not individual member level.

***

### Frequently Asked Questions

#### **Can I use multiple custom domains?**

Currently, each user or team can have one custom domain. If you need multiple domains, consider setting up separate teams for each.

#### **Will my custom domain work with embedded scheduling?**

Yes, you can embed scheduling pages from your custom domain on your website. The embedded experience will use your custom domain for all links and redirects.

#### **What happens if I cancel my Business subscription?**

Your custom domain will stop working, and visitors will see an error page. Your original `zcal.co` links will continue to work. If you resubscribe, you can verify your domain again to restore functionality.

#### Do I need to configure SSL/HTTPS?

No, SSL certificates are automatically provisioned and managed for you. Your custom domain will use HTTPS by default once verified.

#### Can I use the same domain for multiple users/teams?

No, each domain can only be used by one user or team at a time.

#### What happens to my old links when I add a custom domain?

Your old zcal.co links will continue to work. Both domains will be active simultaneously.

#### Can I switch back to zcal.co after using a custom domain?

Yes, you can delete your custom domain at any time, and all links will revert to zcal.co URLs.

#### How long does the entire setup take?

* Adding domain: < 1 minute
* Configuring DNS: 5-10 minutes
* DNS propagation: 5-15 minutes (up to 48 hours in rare cases)
* Verification: < 1 minute
* **Total**: Typically 15-30 minutes

***

*Last Updated: January 2025*


# Custom Notification Email Addresses

### Overview

Custom email domains allow you to send scheduling notification emails from your own branded email address instead of the default `notifications@zcal.co` email. This provides a professional, consistent brand experience for your invitees throughout the entire scheduling process.

#### Benefits

* **Brand Consistency**: All notification emails come from your domain (e.g., `noreply@yourcompany.com`)
* **Professional Image**: Invitees see emails from your company domain, not a third-party service
* **Trust & Deliverability**: Emails from verified domains have better deliverability and are less likely to be marked as spam
* **Team-Specific Emails**: You can use different email addresses for different team notifications

#### What Emails Are Affected

When you configure a custom email domain, the following notification emails will be sent from your custom address:

* **Booking confirmations** to invitees
* **Event reminders** before meetings
* **Follow-up emails** after meetings
* **Cancellation notifications**
* **Reschedule confirmations**
* **Meeting updates and changes**

#### Requirements

* **Business Plan**: Custom email domains are available on the Business tier
* **Domain Access**: You need access to your domain's DNS settings
* **Email Verification**: You must verify ownership of the email address

***

### How It Works

Custom email setup involves three main steps:

1. **Domain Setup**: Configure DNS records to authorize email sending
2. **Email Addition**: Add your custom email address to your account
3. **Email Verification**: Verify you have access to the email address

***

### Setup Instructions

#### Step 1: Add Your Custom Email Address

1. Log in to your account and navigate to <https://zcal.co/account>
2. Click the **Add Email** button
3. Enter your custom email address (e.g., `noreply@yourcompany.com`)
4. Click **Continue**

**Important Notes:**

* You can use any email address on your domain
* Common choices: `noreply@`, `notifications@`, `calendar@`, `bookings@`
* Each user can have multiple custom emails (one default + one per team)

#### Step 2: Configure DNS Records

**Note:** DNS setup only needs to happen once per domain. Once the initial set up is complete, your team members using the same custom email domain can link their email address without needing to do any DNS setup.

After adding your email, you'll be prompted to configure DNS records. You need to add **two DNS records** to your domain:

**DNS Record Details**

| Record Type | Name/Host            | Value/Target          | Purpose                                 |
| ----------- | -------------------- | --------------------- | --------------------------------------- |
| **TXT**     | `[unique-dkim-host]` | `[unique-dkim-value]` | DKIM signature for email authentication |
| **CNAME**   | `pm-bounces`         | `pm.mtasv.net`        | Handle bounce notifications             |

**Example:** If your custom email is `noreply@yourcompany.com`, you'll add records to `yourcompany.com`:

**Where to Add DNS Records**

The location of DNS settings depends on your domain provider. Below is an example of what adding the DNS settings to Cloudflare looks like:

<figure><img src="/files/jNnJ3ibVJBpL6WACuuXK" alt=""><figcaption></figcaption></figure>

<figure><img src="/files/Tnh9iwW3df5CUtfDYzxQ" alt=""><figcaption></figcaption></figure>

**Tips:**

* Copy the exact values from your dashboard using the copy buttons
* DKIM record names are unique to your domain and auto-generated
* Some DNS providers require you to wrap the DKIM value in quotes
* Don't include the root domain in the record name if your provider adds it automatically

#### Step 3: Verify DNS Configuration

1. After adding both DNS records, wait at least 5-15 minutes for propagation
2. Click the **I Have Configured DNS** button in the wizard
3. Wait for the system to verify your DNS records

**DNS Propagation Time:**

* Typical: 5-15 minutes
* Maximum: Up to 48 hours (rare)
* You can retry verification if it fails initially

#### Step 4: Verify Email Access

After DNS verification succeeds, you'll receive a verification email at your custom email address.

**Important**: Even though you're using a send-only email (like `noreply@`), you still need to verify it. Here's how:

1. Check the inbox of someone who can receive emails for your domain
2. If using `noreply@yourcompany.com`, emails might go to:
   * Your catch-all address (if configured)
   * Your domain administrator
   * Your email admin panel
3. Look for an email from zcal with subject "Verify your custom email"
4. Click the verification link in the email
5. You'll be redirected back to Zcal with a success message

***

### Email Management

#### Default Email

Your **default email** is used for all personal scheduling links and invitations.

**Setting a Default Email:**

1. Go to **Settings** > **Custom Email**
2. Find the email you want to set as default
3. Click the menu icon (⋮) next to the email
4. Select **Set as Default**

**Requirements:**

* Email must be fully verified (both DNS and email access)
* Only one email can be default at a time
* Default emails are marked with a green "Default" badge

#### Team Email Assignments

Each team member can assign a single custom email address to be used on their behalf for that team. If no custom email is assigned, the default zcal email is used.

**How Team Assignments Work:**

* **Default email**: Used for all personal links
* **Team-specific emails**: Used when scheduling through that team
* **One email per team**: Each team can use a different custom email
* **No team assignments**: Email is available but not actively used

**Assigning Emails to Teams:**

1. Find the email in your custom email list
2. Click the menu icon (⋮)
3. Select **Manage Team Assignments**
4. Check the teams that should use this email
5. Click **Save**

If a team doesn't have an email assigned to it, it will just use the default email.

**Example Setup:**

```
User: john@company.com (default)
├── Personal links → Use: john@company.com
├── Sales Team → Use: sales@company.com
└── Support Team → Use: su
```

***

### Features & Functionality

#### How Emails Appear to Invitees

When you use a custom email domain, your invitees will see:

**From Field:**

```
From: Richard Smith <noreply@yourcompany.com>
```

**Email Types:**

1. **Booking Confirmation**
   * Sent immediately after booking
   * From your custom email
   * Contains meeting details and calendar links
2. **Reminder Emails**
   * Sent before the meeting (configurable timing)
   * From your custom email
   * Can be customized per invite type
3. **Follow-Up Emails**
   * Sent after the meeting
   * From your custom email
   * Can include custom questions or feedback requests
4. **Cancellation Notifications**
   * Sent when meetings are cancelled
   * From your custom email
   * Includes cancellation reason if provided

#### Default Email Usage

Your **default email** is automatically used for:

* All personal scheduling links
* Profile page bookings
* Direct bookings (not through teams)
* Any invites not assigned to a team

***

### Troubleshooting

#### DNS Verification Failed

**Problem**: When you click "I Have Configured DNS," verification fails.

**Common Causes:**

1. **DNS Not Propagated**: Changes take 5-15 minutes (up to 48 hours)
2. **Incorrect DKIM Record**: The TXT record value must match exactly
3. **Wrong Record Name**: DKIM host must match the provided value exactly
4. **Missing Bounce Record**: Both records are required
5. **DNS Provider Issues**: Some providers have delays or formatting requirements

**Solutions:**

1. **Wait for Propagation**
   * Wait at least 15 minutes after adding DNS records
   * Try verification again
   * Use a DNS checker tool (e.g., mxtoolbox.com, whatsmydns.net)
2. **Verify Record Accuracy**
   * Double-check the DKIM record name against the dashboard
   * Copy and paste values to avoid typos
   * Ensure no extra spaces or characters
   * Check that quotes are correct (some providers require them)
3. **Check DNS Provider Settings**
   * Some providers auto-append your domain - don't add it twice
   * Use the correct record type (TXT for DKIM, CNAME for bounce)
   * Set TTL to 3600 seconds if required

#### Email Verification Not Received

**Problem**: You don't receive the verification email after DNS verification.

**Cause**: The email address doesn't have an active mailbox or catch-all configured.

**Solutions:**

1. **Check Catch-All Settings**
   * Configure a catch-all address in your email admin panel
   * Common locations:
     * **Google Workspace**: Admin Console > Apps > Google Workspace > Gmail > Default routing
     * **Microsoft 365**: Exchange Admin Center > Mail Flow > Rules
     * **cPanel**: Email > Forwarders > Set default address
2. **Temporarily Forward the Email**
   * Create a temporary forward from your custom email to a real mailbox
   * Complete verification
   * Remove the forward after
3. **Use a Real Email Initially**
   * Start with a real email address you can access
   * Verify it fully
   * Change it to `noreply@` after verification
4. **Check Spam/Junk Folders**
   * Verification emails might be filtered
   * Add <support@zcal.co> to your safe senders list
   * Check quarantine if you have email filtering
5. **Resend Verification Email**
   * Click the menu (⋮) next to the email
   * Select "Resend Verification"
   * Wait 2 minutes between attempts

***

### Management & Administration

#### Managing Team Assignments

To assign emails to teams:

1. Navigate to **Settings** > **Custom Email**
2. Find the email to assign
3. Click the menu icon (⋮)
4. Select **Manage Team Assignments**
5. Check/uncheck teams in the dialog
6. Click **Save**

**Rules:**

* Only one email can be assigned per team
* Default email cannot be assigned to teams (it's for personal use)
* Must be fully verified to assign to teams
* Unassigning removes custom email from that team's notifications

#### Removing a Custom Email

To remove a custom email from your account:

1. Navigate to **Settings** > **Custom Email**
2. Find the email to remove
3. Click the menu icon (⋮)
4. Select **Delete**
5. Confirm the deletion

**Effects of Removal:**

* Email is removed from your account
* Domain DNS records can stay (shared by multiple emails)

If this was your only custom email and you're on Business tier, new notifications will revert to zcal's default sender.

***

### Frequently Asked Questions

#### Can I use a free email domain like Gmail or Outlook?

No, you must use a domain you own and control. You cannot use free email providers like `gmail.com`, `outlook.com`, `yahoo.com`, etc., because you don't have access to their DNS settings.

#### What's the difference between custom domain and custom email?

* **Custom Domain**: Changes where your scheduling pages are hosted (e.g., `meet.company.com`)
* **Custom Email**: Changes who notification emails come from (e.g., `noreply@company.com`)

These are separate features that can be used independently or together for complete branding.

#### **Can I have multiple custom emails?**

Yes, you can add multiple custom email addresses. The maximum number equals your team count plus one. You can assign one custom email to  each of your teams. This will be used when sending notification emails where you are the host.

#### **What happens if I remove my custom email?**

Your scheduling links will revert to sending notifications from the default zcal email address. Your invitees will still receive reminders and follow-ups, just from a different sender address.

#### **Will my custom email affect email deliverability?**

Setting up DKIM authentication (required during setup) actually improves deliverability by verifying you're authorized to send from your domain. This reduces the chance of your emails being marked as spam.

#### Can multiple users share the same domain?

Yes! Multiple users in your organization can configure custom emails on the same domain:

* User 1: `calendar@company.com`
* User 2: `bookings@company.com`
* User 3: `noreply@company.com`

The DNS records only need to be set up once per domain. Once they are set up they will be available to use by any team member.

#### Do custom emails work with all invite types?

Yes, custom emails work with:

* One-on-one meetings
* Group meetings
* Round-robin events
* Collective events
* Team events
* Group polls
* All notification types (confirmation, reminder, follow-up, cancellation)


# Custom Favicon

A custom favicon allows you to display your own icon in the browser tab when visitors view your scheduling pages on your custom domain. Instead of the default zcal icon, your brand's favicon will appear, creating a fully branded booking experience.

### Requirements

* **Business plan** subscription
* A **verified custom domain** (see Custom Domain setup guide)

> **Note:** You must set up and verify your custom domain before you can upload a custom favicon. The favicon option will only appear after your domain has been verified.

### Supported File Formats

| Format | Extension |
| ------ | --------- |
| ICO    | `.ico`    |
| PNG    | `.png`    |

**Maximum file size:** 1 MB

### Setup Instructions

#### Step 1: Verify Your Custom Domain

Before uploading a favicon, ensure your custom domain is fully set up and verified. If you haven't configured your custom domain yet, follow the Custom Domain setup guide first.

#### Step 2: Upload Your Favicon

1. Navigate to **Settings** > **Custom Domain** in your Zcal dashboard
2. Scroll down to the **Favicon** section (visible only after your domain is verified)
3. Click the **Upload** button
4. Select your `.ico` or `.png` file (must be under 1 MB)
5. Your favicon will be uploaded and saved automatically

#### Step 3: Verify Your Favicon

Open your custom domain in a new browser tab. You should see your custom icon displayed in the browser tab. If you don't see it right away, try clearing your browser cache or opening the page in an incognito window.

### Managing Your Favicon

#### Changing Your Favicon

1. Go to **Settings** > **Custom Domain**
2. In the **Favicon** section, click **Change**
3. Select your new favicon file
4. The new favicon will replace the previous one immediately

#### Removing Your Favicon

1. Go to **Settings** > **Custom Domain**
2. In the **Favicon** section, click **Delete**
3. Your scheduling pages will revert to the default Zcal favicon

### Teams

Team accounts on the Business plan can also set a custom favicon. Team admins can manage the favicon from the team's custom domain settings.

### FAQ

**Do I need a custom domain to use a custom favicon?** Yes. The custom favicon feature is only available for verified custom domains on the Business plan.

**What happens to my favicon if I remove my custom domain?** Your favicon will be removed along with your custom domain configuration.

**What size should my favicon image be?** A 32x32 pixel image is recommended for the best quality across browsers.

**Will my favicon appear on zcal.co links?** No. The custom favicon only appears on pages served through your verified custom domain.

***

Need help? Contact us at **<support@zcal.co>**.


# Embed

If you are looking to embed your zcal invite page on your website, follow the steps below. Embedding your invite allows people to book meetings with you without ever leaving your website.

### Installing the embed code

1. From the zcal homepage, click the menu button corresponding to the invite you'd like to embed.  Then click the Embed option.
2. The Embed dialog will appear.  Click the Copy Code button to copy the embed code to your clipboard.
3. Paste the embed code in your webpage's HTML where you want it to appear.  It will appear inline with the surrounding content on the page.

![](/files/-MZ_V07AeE84fBUgy2Fz)

Notes:

* If you want the embedded invite widget to be responsive on different screen sizes, you must use the Javascript version of the embed code.
* Embed invite fields can be [pre-populated by editing the query parameters](/invite-settings/pre-populate-form-fields). This also works for UTM parameters.


# Copy times to email

List the times you’re available to meet directly in the body of an email, so your invitee can select whichever meeting time works best without leaving the email client.

### Copy and paste the available times from an invite

#### 1. From the zcal homepage click the menu icon for a given invite link.

<figure><img src="/files/HuIFxTgZddj6es6ACXt5" alt=""><figcaption></figcaption></figure>

#### 2.  Click the Copy times to email menu option.

<figure><img src="/files/Hmr6gLvLX2ORCyrJqI4F" alt=""><figcaption></figcaption></figure>

#### 3. Click the Copy times button to copy the snippet to your clipboard. You can now paste it into the body of your email.

<figure><img src="/files/aUOsIQTq998ySWr8sOL9" alt=""><figcaption></figcaption></figure>

### Remove links from the available times

You can make your available times look like they were hand-typed by unlinking them. Simply toggle off the Link times switch in the dialog.

<figure><img src="/files/0gOhvMDAJc0QTHRaPS27" alt=""><figcaption></figcaption></figure>

&#x20;


# Meeting polls

### Overview

Meeting polls let multiple invitees vote on times that work for a single event, so the organizer can pick the option that works best for everyone's schedule. This takes the back-and-forth out of finding a time across a group.

### How It Works

When you create a meeting poll, you propose a set of candidate times and share the poll link with your invitees. Each invitee selects which times work for them. Once enough responses are in, the organizer reviews the votes and finalizes the time that works best for the group. Once finalized, zcal automatically sends a calendar invitation for the event to all invitees.

### Key Benefits

* **Group consensus:** Find a time that works for everyone without endless email threads or chat messages.
* **Multiple voters:** Any number of invitees can weigh in on the same poll.
* **Automatic invitations:** Once the organizer picks the final time, zcal sends calendar invitations to all invitees automatically.
* **No team required:** Meeting polls can be set up on any zcal account without needing to create a team.

### Common Use Cases

* **Team Meetings:** Coordinate recurring or one-off team meetings across multiple schedules.
* **Conference Calls:** Find a time that works for everyone joining a multi-party call, including across time zones.
* **Project Kickoffs:** Align stakeholders from different groups on a single meeting time.
* **Client Calls with Multiple Attendees:** Pick a time that works for both your team and the client's team.

### Video tutorial

{% embed url="<https://www.youtube.com/watch?t=1s&v=BatyLWeBvcI>" %}


# Group invites

### Overview

Group invites allow multiple invitees to sign up for the same time slot, making them ideal for events where one host meets with many attendees at once. Unlike one-on-one invites, a single time slot can be booked by many people simultaneously.

### How It Works

When you create a group invite, multiple invitees can book the same time slot until the slot fills up. After booking, invitees receive a confirmation with a button or link to add the event to their own calendar.

Because invitees add the event to their calendars themselves rather than receiving an automatic calendar invitation, attendee email addresses stay hidden from each other. This protects invitee privacy and is especially useful for group classes, webinars, and other settings where you don't want participants to see one another's contact details.

### Key Benefits

* **Multiple sign-ups per slot:** One time slot can accommodate many invitees, so you don't need to create separate events for each person.
* **Invitee privacy:** Invitees are hidden from each other since each person adds the event to their own calendar individually.
* **No team required:** Group invites can be set up on any zcal account without needing to create a team.

### Common Use Cases

* **Group Classes:** Run fitness, yoga, language, or other recurring classes where multiple students book the same session.
* **Webinars:** Host online presentations or talks open to many attendees at once.
* **Workshops and Training Sessions:** Offer group training where participants register for the same time slot.
* **Office Hours:** Open up shared time blocks where multiple people can drop in together.
* **Group Coaching:** Lead coaching sessions for cohorts of clients sharing the same meeting time.


# Zoom

## Adding the Zoom integration

1. Open the [account integrations](https://zcal.co/account/integrations) page on zcal.
2. Click the Connect button for Zoom.  You will be sent to the Zoom website.
3. Authorize zcal to connect to your Zoom account. Depending on your Zoom account settings you may need to click the Pre-approve button before you can click the Authorize button.
4. You're all done! You can now add Zoom video conferencing to your zcal events.

### Adding Zoom video conferencing to your zcal events

Once you've connected your zcal account to Zoom you can configure your invites to automatically create Zoom links every time a new event is created.

1. Create or edit an invite.
2. Change the meeting location to Zoom.
3. Save the invite.
4. Now when invitees book a meeting through this invite a unique Zoom link will appear in the calendar event location.

### Removing the Zoom integration

1. Open the Zoom website and login.
2. Navigate to the Zoom App Marketplace.
3. Click Manage > Installed Apps
4. Click the zcal app.
5. Click Uninstall.

## &#x20;Did this help answer your question?

![thumbs up](https://s3.us-east-2.amazonaws.com/knowledgebase-web/thumbsup.png)[![thumbs down](https://s3.us-east-2.amazonaws.com/knowledgebase-web/thumbsdown.png)](/integrations/zoom)

Thanks for the feedback! 🙏🏽


# Webhooks

By setting up webhooks, you can receive automated notifications when events are scheduled, canceled, or modified, allowing you to build powerful integrations with your existing tools and workflows.

Webhooks can be configured for both an individual user as well as each team:

* **User**: Receives events from all invite links for the individual user.
* **Team**: Receives events only from that team's invite links (collective and round robin invites)

### Setting up Webhooks

To set up webhooks for either an individual user or a team:

1. Navigate to the integrations for your accout or for the team.
   * For users: <https://zcal.co/account/integrations>
   * For teams: Your team's integration settings page
2. Click "Connect" next to the webhooks integration.
3. Configure the following:
   * Subscriber URL: The HTTP POST endpoint where webhook payloads will be sent
   * Secret Key (Optional): A key that allows you to verify incoming webhooks are genuinely from zcal. If provided, we'll attach an x`-zcal-webhook-signature` header to all webhook events containing a SHA256 hash of the payload signed with your secret key
4. Click "Test Endpoint" to verify your configuration.
5. Save your webhook settings

### Webhook Payload

When an event occurs in the system (like a booking being created), we'll send a HTTP POST request to your endpoint. Each notification has a consistent structure that helps you process the data reliably.

**Event Types**

The webhook can be triggered by the following events:

| Event Type          | Description                        |
| ------------------- | ---------------------------------- |
| `event.created`     | Sent when a new booking is created |
| `event.rescheduled` | Sent when a booking is rescheduled |
| `event.cancelled`   | Sent when a booking is cancelled   |

For detailed documentation about the webhook payload schema see this document:

{% content-ref url="/pages/UhjxXgG2cOBdd7CrfCc6" %}
[Webhook Payload](/integrations/webhooks/webhook-payload)
{% endcontent-ref %}

### **Webhook Signatures (Optional)**

Webhook signatures are optional but recommended for security. When enabled, each webhook request includes a signature in the x`-zcal-webhook-signature` header. The signature is generated using HMAC SHA-256.

#### Example Signature Verification (Node.js)

```javascript
const crypto = require('crypto');

function verifyWebhookSignature(payload, signature, secret) {
    const expectedSignature = crypto
        .createHmac("sha256", secret)
        .update(JSON.stringify(payload))
        .digest("hex");
    
    return signature === expectedSignature;
}
```


# Webhook Payload

Every webhook notification is a HTTP POST request that contains three main parts:

1. The type of event that occurred
2. When it happened
3. The detailed event data

Here's the complete structure broken down:

### Webhook Payload

Every webhook notification sent consists of three core components:

* Event Type - What kind of action occurred (created, cancelled, etc.)
* Timestamp - When the action happened
* Event Data - The complete details of the booking

| Field        | Type   | Description                                                                                             |
| ------------ | ------ | ------------------------------------------------------------------------------------------------------- |
| `type`       | string | The type of event that triggered the webhook (e.g., `event.created,event.rescheduled, event.cancelled`) |
| `created_at` | string | ISO 8601 timestamp of when the webhook was generated                                                    |
| `data`       | Event  | Contains the detailed event information (see Event Fields below)                                        |

### **Event Fields**

The comprehensive event data structure containing all information about an event, including timing, participants, location, and any relevant team details.

| Field       | Type                   | Description                                              |
| ----------- | ---------------------- | -------------------------------------------------------- |
| `id`        | string                 | Unique identifier for the event                          |
| `startDate` | string                 | Start time of the event in ISO 8601 format               |
| `duration`  | number                 | Duration of the event in minutes                         |
| `cancelled` | boolean                | (Optional) Whether the event has been cancelled          |
| `eventName` | string                 | Name/title of the event                                  |
| `invite`    | EventInviteApiResponse | Event invite details                                     |
| `location`  | Location               | (Optional) Location information for the event            |
| `hosts`     | array\[Host]           | Array of event hosts/organizers                          |
| `attendees` | array\[Attendee]       | Array of event attendees                                 |
| `team`      | Team                   | (Optional) Team information if the event is team-related |

### Location

Specifies where and how the meeting will take place, including all necessary details for online meetings if applicable.

| Field                    | Type   | Description                                         |
| ------------------------ | ------ | --------------------------------------------------- |
| `locationType`           | string | Type of location (e.g., "online", "in-person")      |
| `locationText`           | string | (Optional) Location text if using a custom location |
| `onlineMeeting`          | object | (Optional) Online meeting details if applicable     |
| `onlineMeeting.url`      | string | Meeting URL                                         |
| `onlineMeeting.id`       | string | (Optional) Meeting ID                               |
| `onlineMeeting.passcode` | string | (Optional) Meeting passcode                         |

### Attendee

Represents a participant in the meeting, including their contact information and any custom responses they provided during booking.

<table><thead><tr><th width="263">Field</th><th width="222">Type</th><th>Description</th></tr></thead><tbody><tr><td><code>name</code></td><td>string</td><td>(Optional) Attendee's full name</td></tr><tr><td><code>email</code></td><td>string</td><td>Attendee's email address</td></tr><tr><td><code>timezone</code></td><td>string</td><td>(Optional) Attendee's timezone</td></tr><tr><td><code>phoneNumber</code></td><td>string</td><td>(Optional) Attendee's phone number</td></tr><tr><td><code>type</code></td><td>string</td><td>Identifies the attendee's role: either <code>invitee</code> (primary booker) or <code>guest</code> (additional attendee)</td></tr><tr><td><code>customQuestionAnswers</code></td><td><p>array[{</p><p>  question: string, </p><p>  answer: string</p><p>}]</p></td><td>(Optional) Responses to custom booking questions</td></tr></tbody></table>

### Host

Represents an organizer or host of the meeting, containing their essential contact information.

> **Note about team events:**
>
> * For collective team invites: Contains all team members included in the event
> * For round robin invites: Contains the selected team member for the event

| Field   | Type   | Description                 |
| ------- | ------ | --------------------------- |
| `name`  | string | (Optional) Host's full name |
| `email` | string | Host's email address        |

### Team

For invites related to a team, this contains information about the team associated with the event.

| Field  | Type   | Description                    |
| ------ | ------ | ------------------------------ |
| `id`   | string | Unique identifier for the team |
| `name` | string | Name of the team               |

## Sample Payload

```
{
  "type": "event.created",
  "created_at": "2025-02-09T14:46:11.469Z",
  "data": {
    "id": "sample-event-id",
    "startDate": "2025-02-12T20:30:00.000Z",
    "duration": 30,
    "cancelled": false,
    "eventName": "Jane Doe and John Smith",
    "location": {
      "locationType": "zoom",
      "onlineMeeting": {
        "url": "https://us05web.zoom.us/j/123456789?pwd=AbDeFR2Mebh0vioMYCvLsb2RA3fR.1",
        "id": "123456789",
        "passcode": "Ac0QRP"
      }
    },
    "hosts": [
      {
        "name": "John Smith",
        "email": "john.smith@gmail.com"
      }
    ],
    "attendees": [
      {
        "name": "Jane Doe",
        "email": "jane.doe@gmail.com",
        "timezone": "America/New_York",
        "type": "invitee",
        "customQuestionAnswers": [
          {
            "question": "What is your favorite color?",
            "answer": "Blue"
          },
          {
            "question": "Select all options you would like:",
            "answer": [
              "Option 1",
              "Option 3"
            ]
          }
        ]
      },
      {
        "email": "guest@example.com",
        "type": "guest"
      }
    ],
    "invite": {
      "id": "aZbYc_8",
      "name": "30 minute call",
      "inviteType": "one_on_one",
      "description": "Meet with John for 30 minutes!"
    }
  }
}
```


# Zapier

With the Zapier integration you can connect zcal to over 5000 other application.

### Zapier integration: User vs Team

zcal supports generating API keys for either an individual user or for an entire team.

* **Individual User** **integration** - This integration can receive all booked, rescheduled and cancelled events for a specific user. They will get events for all individual invite types as well as any team invites they are a host of.
* **Team integration** - This will received all booked, rescheduled and cancelled events for any team invites booked for a team. Currently team invites include the Collective and Round Robin invite types.

### Adding the Zapier integration

<mark style="color:blue;">1.</mark> For  setting up an individual user zapier integration, go to go to Account Settings in zcal. For a team integration, go to the team page.

2\. Click on Integrations.

<figure><img src="/files/0h00RBadWY3pnaoWBXL1" alt=""><figcaption></figcaption></figure>

3\. Click on Connect in front of Zapier.

<figure><img src="/files/5hBfiw8r9YF86XNlLuSA" alt=""><figcaption></figcaption></figure>

4\. Click on Generate API Key. Save this key somewhere secure. If it is lost, you will need to generate a new one.

<figure><img src="/files/7Xa6nIHBm5e13WOEXoMN" alt=""><figcaption></figcaption></figure>

5\. Click on Copy.

<figure><img src="/files/uXf5SeWBwhkAbqn5oZ4J" alt=""><figcaption></figcaption></figure>

6\. Now, go to your Zapier account and Click on 'My Apps'.

<figure><img src="/files/KIDGJUMBCwz3lbei6pUq" alt=""><figcaption></figcaption></figure>

7\. Type "zcal" to search for it.

<figure><img src="/files/cxTyx1dTRoiEh9KSyMlX" alt=""><figcaption></figcaption></figure>

8\. Click on Connect in front of zcal.

<figure><img src="/files/BW9aKnOid7flX2sG6zkF" alt=""><figcaption></figcaption></figure>

9\. Paste your API key.

<figure><img src="/files/mXUbCOu7AHRIX6n55Uyo" alt=""><figcaption></figcaption></figure>

10\. Click on 'Yes, Continue'. Voila! it's done. 🎉

Start creating zaps by connecting zcal to more than 5000 apps. Check out some inspirations here: <https://zapier.com/apps/zcal/integrations>.

<figure><img src="/files/xuD1yflE3nB1XvHCGExW" alt=""><figcaption></figcaption></figure>

###


# Stripe

Connect zcal with Stripe to easily accept payments from invitees before they book time with you.

### Adding the Stripe integration

1. Go to Account Settings in zcal.
2. Click on integrations then click on “Connect” next to Stripe.
3. You will be redirected to Stripe to fill out details to connect your account to Stripe.

### Turning on Stripe payments for your invite link

1. Edit your invite.
2. Click Next twice.
3. Under "Scheduling Options" find the "Accept payments" settings.
4. Turn on the setting switch.
5. Enter the amount and currency you wish to collect for every booking.

<figure><img src="/files/lV0i4Qwak0mfaSoOlDg0" alt=""><figcaption></figcaption></figure>

### Refunding payments

When an event is cancelled, zcal **does not** automatically issue a payment refund.

If you wish to issue a refund you can do so through the [Stripe dashboard](https://dashboard.stripe.com/)

1. Navigate to the Stripe Dashboard and log into the account you have connected to zcal: <https://dashboard.stripe.com/payments>
2. Find the payment you would like to refund and click on it.
3. There is a “refund” button in the top right corner - once you click that Stripe will start the process of issuing a refund.

### Removing the Stripe Integration

1. Go to Account Settings in zcal.
2. Click on integrations and press the Eject button to the right of the Stripe integration.

**Note**: If you disconnect Stripe, any current invites with payments enabled will no longer work. You can reenable them by editing the invite settings and disabling the payments setting.

### Access and withdraw balances

All transaction and balance information can be accessed by logging into your Stripe dashboard with the same account you connected to zcal: <https://dashboard.stripe.com/>

### Sending Receipts and Invoices to customers

If your users request receipts or invoices for booking fees they paid to you, you can easily send one through the Stripe Dashboard. To send a receipt:

1. Go to the “Payments” section in the Stripe Dashboard: <https://dashboard.stripe.com/payments>
2. Find the transaction you want to send a receipt for.
3. Scroll down to find the “Send Receipt” button next to the “Receipt History” view.

If you would like to enable receipts to automatically be sent to all bookings, you can do so in the Stripe “Customer Email Settings”: <https://dashboard.stripe.com/settings/emails>

### Fees

Currently, there are two fees for Stripe payments through zcal:

* **zcal commission** - On the free plan, zcal has a 3% commissions on Stripe payments. Upgrading to to zcal Pro removes this fee. This goes towards continued development and costs associated with building and maintaining zcal. You might see this as the “application fee” in your Stripe dashboard.&#x20;
* **Stripe transaction fee** - This is the fee Stripe takes for all transactions that go through its platform. Currently, it is at 2.9% + $0.30 per successful card charge. There is more information on the [Stripe website](https://stripe.com/pricing#pricing-details).


# Coupons

Our integration with Stripe allows you to offer flexible coupon options. When the "Allow Coupons" setting is enabled, guests will be able to use promo codes to get discounts on paid events.

**Note**: Currently all coupons and promo codes are managed within Stripe. For more information about how coupons and promo codes work, see the [official Stripe documentation](https://docs.stripe.com/billing/subscriptions/coupons)

## Creating Coupons for Bookings

#### Prerequisites

* A connected Stripe account
* Access to the Stripe Dashboard

#### Steps to Create Coupons

1. **Create a Coupon in Stripe**
   * Log into your Stripe Dashboard and navigate to Coupons: <https://dashboard.stripe.com/coupons>
   * Click "Create Coupon"
   * Set your discount type (percentage or fixed amount)
   * Configure coupon duration (one-time, multiple months, forever)<br>

     <figure><img src="/files/FWimd85BvWHmRrlRXdqd" alt=""><figcaption></figcaption></figure>
2. **Allow coupons in zcal**\
   Create a new invite or edit an existing invite. Toggle both the "Accept Payments" and "Allow coupons" settings to enabled.
3. **Restrict coupon to a specific invite (Optional)**\
   You can restrict coupons to work only with specific invite links by linking them to Stripe products. This requires configuration in both Stripe and zcal.
   * In Stripe, create a product to represent the set of invite links you want the coupon to work with.
   * In the Stripe, edit your coupon and turn on the "Apply to specific products" option. This can be used to ensure your coupon is only used for a specific invite link. Select any relevant products from the dropdown.
   * In zcal, select the same product when configuring the payment settings for a particular booking link. This will ensure the coupon can only be used for this booking link.<br>

     <figure><img src="/files/2z4jEv1hn76v7khqsP9T" alt=""><figcaption></figcaption></figure>
4. **Generate Promotion Codes**\
   After the coupon is created, you can use it to generate "promotion codes" within Stripe. These promotion codes are the codes that should be shared with your clients - they are used to redeem the discount.

   * From the coupon details page, click "Add a promotion code"<br>

     <figure><img src="/files/tFAlEWiibe5dgX47Qgsx" alt=""><figcaption></figcaption></figure>
   * Create a user-friendly code and configure any settings you wish for the promo code

   <div align="center"><figure><img src="/files/fHa7Re04Eyh7Sbgpqer1" alt="" width="457"><figcaption></figcaption></figure></div>
5. **Testing the promo code**

   Once the invite link is set up in zcal with both the "Accept Payments" and "Allow coupons" settings enabled, you can open the invite link to test the promo code. When you get to the Stripe checkout page, you should be able to add the promo code and see it getting applied.<br>

   <figure><img src="/files/wGEqxTl4M7pEmfsAqwEh" alt=""><figcaption></figcaption></figure>

## <br>


# Packages

## Using coupons for package booking redemption

If you want to sell a package of multiple bookings (e.g., a 5-session package), you can use 100% off coupons to manage the redemption process. This lets clients book their sessions without additional payment. It also lets you track and control usage.

For more information about using promo codes with Stripe more generally, see the [Coupons](/integrations/stripe/coupons) page.

#### Creating a package coupon

1. **Create the Base Coupon**
   * Create a new coupon in Stripe and set the discount type to "Percentage" and set the discount amount to 100%.<br>

     <figure><img src="/files/emWOxpUUl1clTwz6Azuw" alt=""><figcaption></figcaption></figure>
2. **Generate a unique promo code for a single package**&#x20;

   Each promotion code can be limited to match the number of sessions in the purchased package. For example, if a client bought a 5-session package, set their promo code to have 5 maximum redemptions. When they've used all redemptions, the code becomes invalid.

   * On the for the coupon you just created, click on "Add a promotion code"<br>

     <figure><img src="/files/v9PxyS0caOevlFSpBZuF" alt=""><figcaption></figcaption></figure>
   * Enter in a unique code and limit the number of times the code can be redeemed to be the number of sessions in your package.<br>

     <figure><img src="/files/KlAMzEbFoyiOY2gIEuFq" alt=""><figcaption></figcaption></figure>
   * Share the promotion code with your client. They can enter this same code each time they book a session until they've used all their package redemptions. All redemptions are tracked within Stripe.


# Google Analytics

The Google Analytics integration allows you to track visits and actions on your zcal scheduling pages. Note that zcal only supports Google Analytics 4. We do not support Universal Analytics, which was deprecated by Google in 2023.

### Events sent by zcal

zcal sends the following events to Google Analytics along with the data parameters **event\_category** and **event\_label**, which represent the invite id for an invite page and the custom slug associated with an invite or profile page, respectively.

| Event name                        | Invitee user action             |
| --------------------------------- | ------------------------------- |
| **zcal\_profile\_view**           | Views the profile page          |
| **zcal\_invite\_view**            | Views the invite page           |
| **zcal\_invite\_submit**          | Submits the invite page form    |
| **zcal\_invite\_schedule\_event** | Successfully scheduled an event |

### Adding the Google Analytics integration

To get started, you'll need a Google Analytics 4 Measurement ID. [Learn how to find your Measurement ID](https://support.google.com/analytics/answer/9539598).

1. Open the [Account Integrations page](https://zcal.co/account/integrations) and click the **Connect** button next to Google Analytics.
2. A dialog will open. Enter your **Google Analytics 4 Measurement ID** in the dialog text field and submit.
3. To confirm your integration is working, open your zcal invite page and complete a test booking. You should see the events appear immediately under the Events section in the Google Analytics Realtime report. [Learn more about the Realtime report](https://support.google.com/analytics/answer/9271392?hl=en\&ref_topic=9303476).

### Removing the Google Analytics integration

1. Open the [Account Integrations page](https://zcal.co/account/integrations) and click the menu button to the right of the Google Analytics integration.
2. Click the **Disconnect** menu option.


# Meta Pixel

The Meta Pixel integration allows you to track visits and actions on your zcal scheduling pages.

### Adding the Meta Pixel integration

To get started, you'll need a Meta Business account and a Meta Pixel ID.

1. Open the [Account Integrations page](https://zcal.co/account/integrations) and click the **Connect** button next to Meta Pixel.
2. A dialog will open. Enter your **Meta Pixel ID** in the dialog text field and submit.
3. To confirm your integration is working, open your zcal invite page and complete a test booking. You should see the events appear in Meta Event Manager after a few minutes.
4. In Meta Event Manager click the **Verify** button for each of the zcal events sent to your Meta Pixel.<br>

<figure><img src="/files/Xq8VoXHWowgbNTwPDyvZ" alt=""><figcaption></figcaption></figure>

You may also need to

* Add zcal.co in the domain allow list in the Meta Event Manager
* Confirm in the dataset page that the events are "from your business"

###

### Events sent by zcal

zcal sends the following events to Meta Pixel along with the data parameters **event\_category** and **event\_label**, which represent the invite id for an invite page and the custom slug associated with an invite or profile page, respectively.

| Event name                        | Invitee user action             |
| --------------------------------- | ------------------------------- |
| **zcal\_profile\_view**           | Views the profile page          |
| **zcal\_invite\_view**            | Views the invite page           |
| **zcal\_invite\_submit**          | Submits the invite page form    |
| **zcal\_invite\_schedule\_event** | Successfully scheduled an event |

### Removing the Meta Pixel integration

1. Open the [Account Integrations page](https://zcal.co/account/integrations) and click the menu button to the right of the Meta Pixel integration.
2. Click the **Disconnect** menu option.


# Free Forever plan

At zcal we believe that everyone should be able to enjoy the benefits of scheduling automation. That's why we offer **the most generous Free Forever plan** on the web, with all the features you will ever need for personal use.

Our Free Forever plan includes the following features:

* Unlimited invite links&#x20;
* Unlimited meeting polls&#x20;
* Calendar sync
* Video conference integrations&#x20;
* Custom questions
* Email reminders
* Zapier integration
* Stripe integration&#x20;
* Voting deadlines&#x20;
* No ads ever

We're working on making zcal better every day and are continuously adding more great functionality to our free product.


# Pro plan

The Pro plan is designed to help teams and business owners manage their client scheduling.

It includes the following features:

* Team creation
* [Round robin scheduling](/teams/round-robin)
* [Collective scheduling](/teams/collective-invites)
* No commission on Stripe payments
* [File upload custom questions](/invite-settings/custom-questions/file-upload)
* Multiple email reminders
* Customizable email reminders
* [Google Analytics integration](/integrations/google-analytics)
* [Meta Pixel integration](/integrations/meta-pixel)
* Unlimited group invite invitees
* Unlimited welcome videos
* Upload your own welcome video
* Redirect on booking
* Priority support


# Business plan

## Business plan

The Business plan is built for teams that want a fully branded scheduling experience and higher messaging limits.

It includes everything in the [Pro plan](https://help.zcal.co/pricing/pro-plan), plus the following features:

* [Custom domain](https://help.zcal.co/customization/custom-domain) — host scheduling pages, profiles, and polls on your own subdomain
* [Custom notification email addresses](https://help.zcal.co/customization/custom-notification-email-addresses) — send booking confirmations, reminders, follow-ups, cancellations, reschedules, and updates from your own branded email address instead of `notifications@zcal.co`
* [Custom favicon](https://help.zcal.co/customization/custom-favicon) on verified custom domains
* zcal branding removed from scheduling pages, emails, and calendar events
* 1,500 [SMS credits](https://help.zcal.co/invite-settings/sms-reminders) per month
* Priority support


# Payments and Billing

## How do I access my invoices?

To access your invoices, please follow these steps:

1. Go to [zcal.co/account](https://zcal.co/account).
2. Select “Manage Billing”.
3. All invoices should be available in your Stripe portal under "Invoice History"

## How do I change my billing information?

To update your payment information, please follow these steps:

1. Go to [zcal.co/account](https://zcal.co/account).
2. Select “Manage Billing”.
3. You can adjust all billing details and payment methods in the Stripe portal.

## How does adding users to my team affect billing?

Adding a new user to your team will result in the following billing adjustments:

* You will be charged the prorated amount for that seat for the remainder of the billing cycle.
  * For instance, if you are halfway through the billing cycle and add a seat, you will be charged half of the cost of a seat to account for the remainder of the billing cycle.
* You will be charged the full amount for that seat as soon as the next billing cycle starts

## How do I cancel my subscription?

To cancel your subscription, please follow these steps:

1. Go to [zcal.co/account](https://zcal.co/account).
2. Select “Manage Billing”.
3. Press "Cancel Plan"

You will still have access to zcal Pro for the remainder of the billing cycle.


# General FAQ

## Why is Google Calendar sending invitations with the subject "Invitation from an unknown sender?"

Google has enacted a new anti-spam measure that hides calendar invites from unknown senders. Google Calendar will now only automatically add meetings to an invitee's calendar if the sender has previously interacted with the sender in Gmail. If your invitees use Google Calendar and you haven't had any previous email interactions with them, they need to click 'I know the sender' and 'Yes' to accept your invitation.

## How do I add users to my Pro plan?

You can add users to your account by first creating a team at <https://zcal.co/teams>. After you've created a team you'll land on the Members tab. Click the "Invite team member" button to invite a user by email.

## Do invitees need to sign up for zcal?

Nope! Your friends and colleagues can respond to your scheduling links without signing up for a zcal account. That said signing up for a zcal account can make the scheduling process even faster. Registered users benefit from seeing calendar overlays on invites and polls, allowing them to see their calendar events on the scheduling page without having to switch tabs to check their calendar app.

## What do I do if I'm about to lose access to my zcal account email address?

If your zcal account email is tied to your work or school and you want to change it to your personal email, click the 'Change email' link on the [account page](https://zcal.co/account). You'll be guided through a series of steps to confirm your new account email. Once you're done you can login to zcal using your new email address.

## What do I do if I've lost access to my zcal account email address?

Having access to your email is necessary to protect your zcal account. If you no longer have access to the email tied to your account, your best option is to create a new zcal account under another email address.


# Availability FAQ

## I can't figure out what's wrong with my availability. Please help!

We've built the [availability troubleshooter](/availability/availability-troubleshooter) to help you make sense of your available time slots. To activate the troubleshooter, simply open your invite page. Then click on the wrench icon in the top blue bar at the top of the screen.

## Why are calendar events not being blocked on my invite?

There are several common reasons why time slots can appear that you may expect to be blocked due to calendar conflicts:

1. The conflicting calendar event has its status set as Free. This is often the case with all-day events created in Google Calendar and Outlook. **Note: zcal only blocks off events that have their status set to Busy.** See this [tutorial](https://help.vectera.com/en/support/solutions/articles/7000072682-how-to-change-the-status-of-events-in-google-calendar-from-free-to-busy-or-out-of-office-) on how to toggle event status in Google Calendar.
2. The conflicting event has its visibility set to "Only me." This is often the case with events that are added to your Google Calendar automatically by Gmail. **zcal doesn't have permission to read "Only me" events which is why they aren't blocked.** To get around this issue, change the visibility on the event to "Private."
3. The conflicting event is on a different calendar than your primary calendar. You can specify which calendars to read conflicts from on the [account calendars](https://zcal.co/account/calendars) page.
4. You have turned off double booking prevention on your invite. zcal will only prevent invitees from booking over conflicting events in your calendar when this setting is turned on.

## Why are times missing on my scheduling page?

#### Invites

Usually, when a time slot on your invite page is missing it's because it conflicts with an event in your calendar that has its status set to **Busy**. Note that this event may have been added to your calendar after the invite was originally created.  zcal hides conflicts from the available times in order to prevent double booking. You can turn this setting off by editing your invite and toggling the **Block external events** switch on Step 2.

#### Polls

On the group invite status page times that are in the past are hidden by default. You can view past times and their votes by clicking the **Show past times button**.

Times may also be hidden because your invite has double booking prevention turned on and there is a conflicting event in your calendar. You can turn off double booking prevention by editing your invite and toggling the **Block external events** switch on Step 2.

## Can I use a single link to schedule multiple meetings?

#### Invites

Invite links can be reused to book multiple meetings. You do not need to create a separate invite for each meeting. The only time an invite link expires is if you set its date range to fixed start and end dates that have since elapsed.&#x20;

#### Polls

Polls are one-time use only. Once you select the final meeting time, an event is created and the poll can no longer be voted on.


# Pricing

## Is zcal really free?

Yes! zcal offers a [Free Forever plan](/pricing/free-forever-plan) that is 100% free to use.

Our team understands that the best internet services prioritize building great products ahead of making money.  So we are laser focused on one goal - delivering the best user experience possible. We are committed to making sure zcal is the best scheduling service on the web.

If you run your business on zcal, you may be a good fit for our [Pro or Business plan](https://zcal.co/pricing), which add team scheduling, advanced automations, and deeper customization.


# Polite ways to share a link 🙂

Looking for a polite script to use when scheduling time with prospects and clients? Try one of these 👇

1.)  “What days and times work best for you? Or if you prefer, you can book a time on my zcal here.”&#x20;

&#x20;2.) “What's your Wednesday looking like? If it’s easier, you can schedule a time directly on my calendar.”

3.) “Feel free to share some times you’re available! Or to avoid any back-and-forth, please use my scheduling link to pick the time that works best for you.”

4.) “Please let me know some times that work well for you, or if it’s easier, feel free to use my zcal link here"


# Missing calendar invitations (Google spam policy)

How Google's new spam policy may be affecting your invitations

Google recently implemented a new anti-spam policy that may change how your zcal invitations appear on your invitees' calendars. To ensure your meetings stay on track and your guests have a seamless experience, here is what you need to know and how you can manage it within zcal.

#### What is happening?

Google Calendar has introduced a security setting that hides invitations from "unknown senders." By default, Google now only automatically adds meetings to a recipient's calendar if the sender is someone they have previously interacted with via Gmail. This Google policy affects Google Calendar and all scheduling tools that integrate with it.

If you are sending a calendar invitation to someone for the first time, your invitation might not appear on their calendar automatically. Instead, they may see an email with a grey banner labeled **"Unknown sender: not added to calendar yet."**

#### How it affects your invitees

If your guest hasn't emailed you before, they will need to manually confirm the event by clicking **"I know the sender"** and then selecting **"Yes"** to accept the invite. This adds a bit of friction to the scheduling process that we all want to avoid.

#### Steps you can take with zcal

While this is a Google-wide policy affecting all scheduling tools, there are several ways you can use zcal’s features to minimize no-shows and ensure your meetings are confirmed:

**1. Encourage your guests to update their Google settings**\
The most permanent fix is for your invitees to adjust their own Google Calendar settings. They can go to **Settings > General > Event settings** and change the "Add invitations to my calendar" option from "Only if the sender is known" to **"Everyone."**

**2. Use zcal’s Automated Reminders**\
Since invitations might not auto-populate, it is more important than ever to keep your meeting top-of-mind. You can enable zcal’s **Email and SMS Reminders** to send a nudge to your guests before the meeting starts.

* **Pro Tip:** With a **zcal Pro** or **Business** plan, you can customize these reminder messages to include a personal note, ensuring your guest knows exactly who you are and why you're meeting.

<br>